
Turn your Phone to Landscape
![]()
The Brand Manager and its Colors
With the increasing amount of emails and texts and web pages we look at every day, it becomes more and more important to ‘feel’ where the information, the message is coming from, even when scrolled down on the message. Introducing the brand manager. In order to make it simple for you and assuming you have already a logo and a website or another image representing your brand, you are all set to go!!
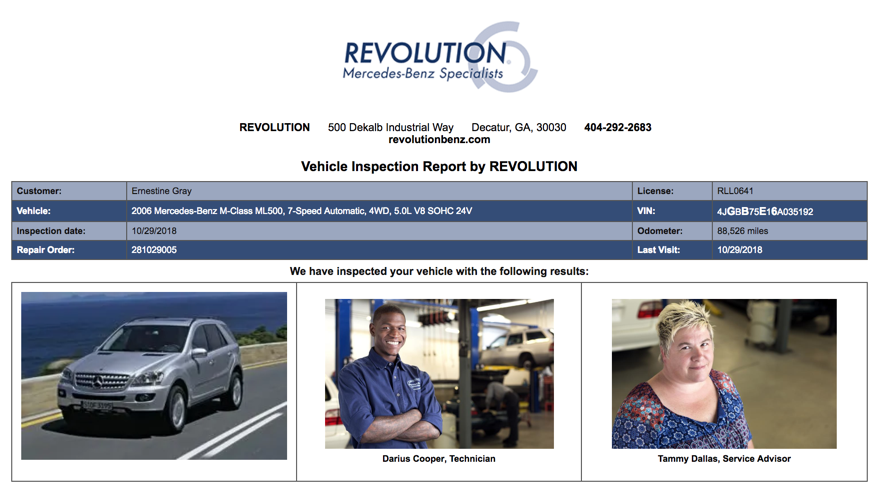
In addition, the header of the Inspection Results document is a perfect place to add additional actions/information related to the inspection results.
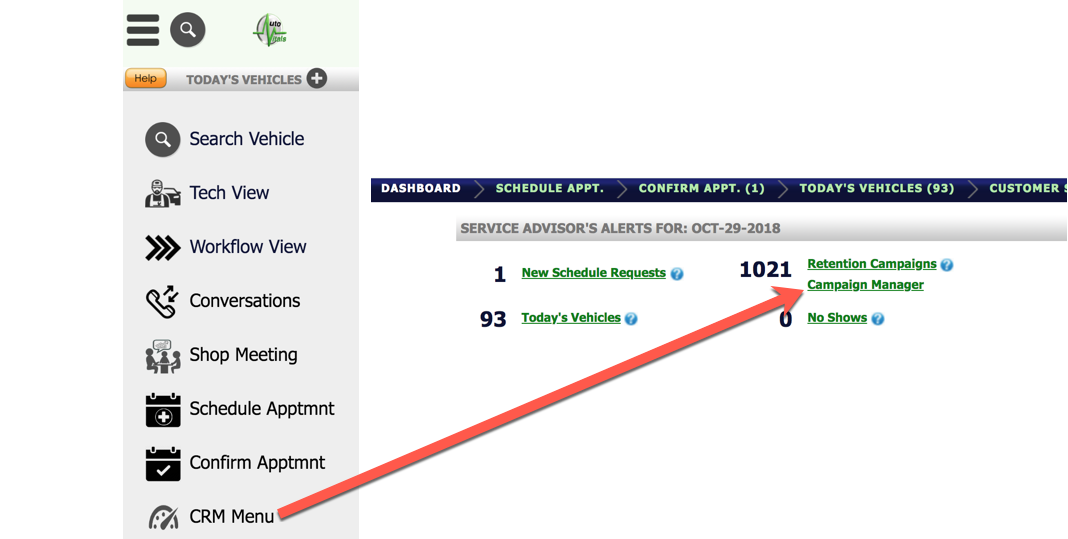
The brand manager is part of the campaign manager and can be accessed by clicking the CRM menu on the TVP.
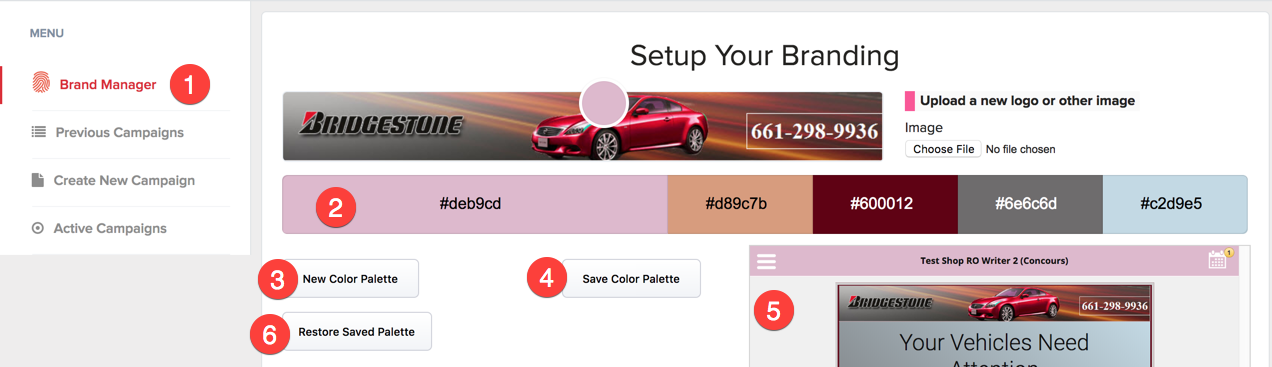
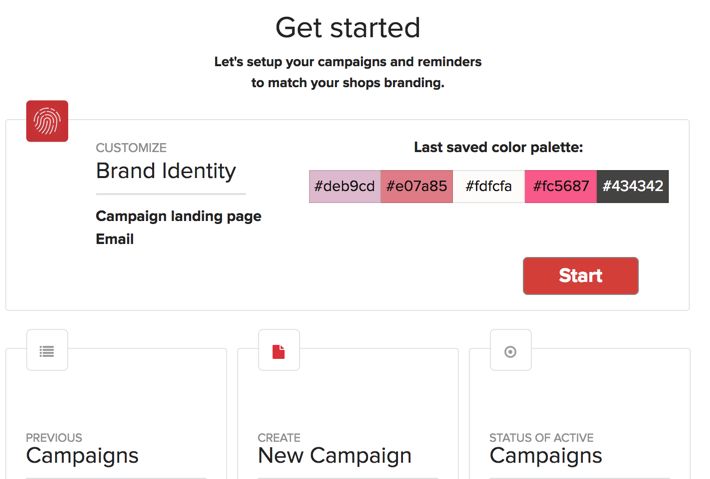
Once in the brand manager, you will see something like the image with the respective elements
- the brand manager access from the main menu
- the selected color palette of 5 colors either created by the brand manager automatically or manually defined by you, both based on the shop banner uploaded to the AutoVitals system, which is located above the colors
- the ability to create a new color palette by simply pressing the button
- the ability to save a color palette you liked (once you have saved it it will be live for all messages)
- the preview of the color palette using the service reminder landing page and the workflow status email page
- the ability to restore a color palette you save previously and you still like better than the current one
Now press the ‘New Color Palette” as often as you wish and see in the preview how it will shape your landing pages and emails. Check them out in the 5 previews serving as typical examples.
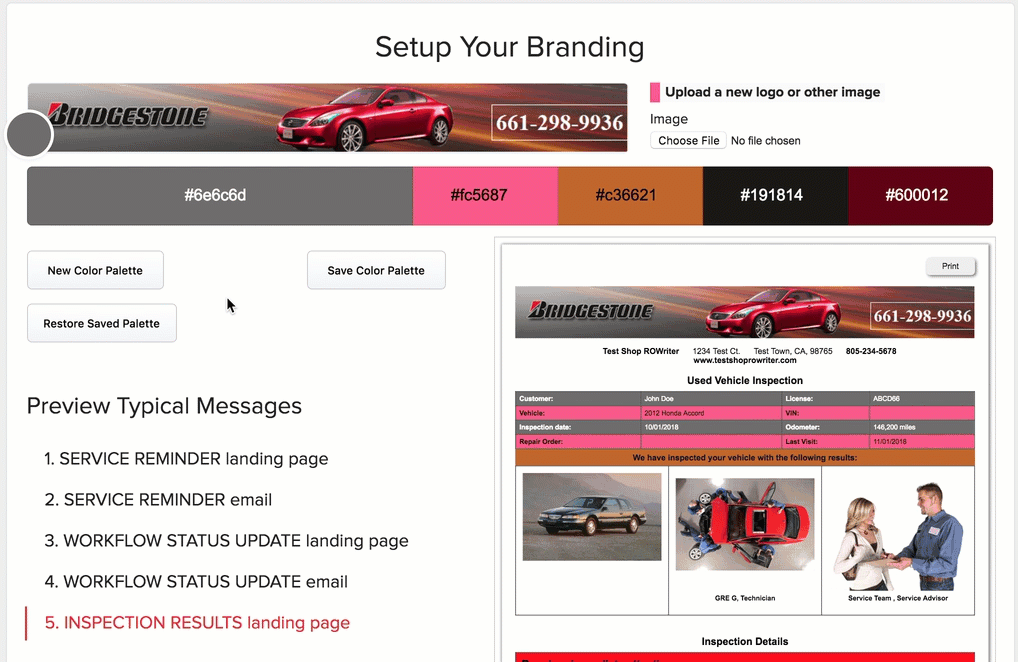
Do you like most of it and maybe just one color is off? just click on that color and either type in the color code or more simply take the color picker on the banner and move it to the spot representing the color you like to use.
Once you like what you see, save the color palette and all your messages and the inspection results header will follow your definition.
Do you want to change the banner we created for you? Just go to the inspection settings and upload a new one. The following rules apply to your uploaded banner dimension when applied to all messages:
- The banner can’t be shown bigger than its original size
- The banner can’t be higher than 10em (~192px)
- The banner can’t be wider than the page width
- The banner always has the original proportions
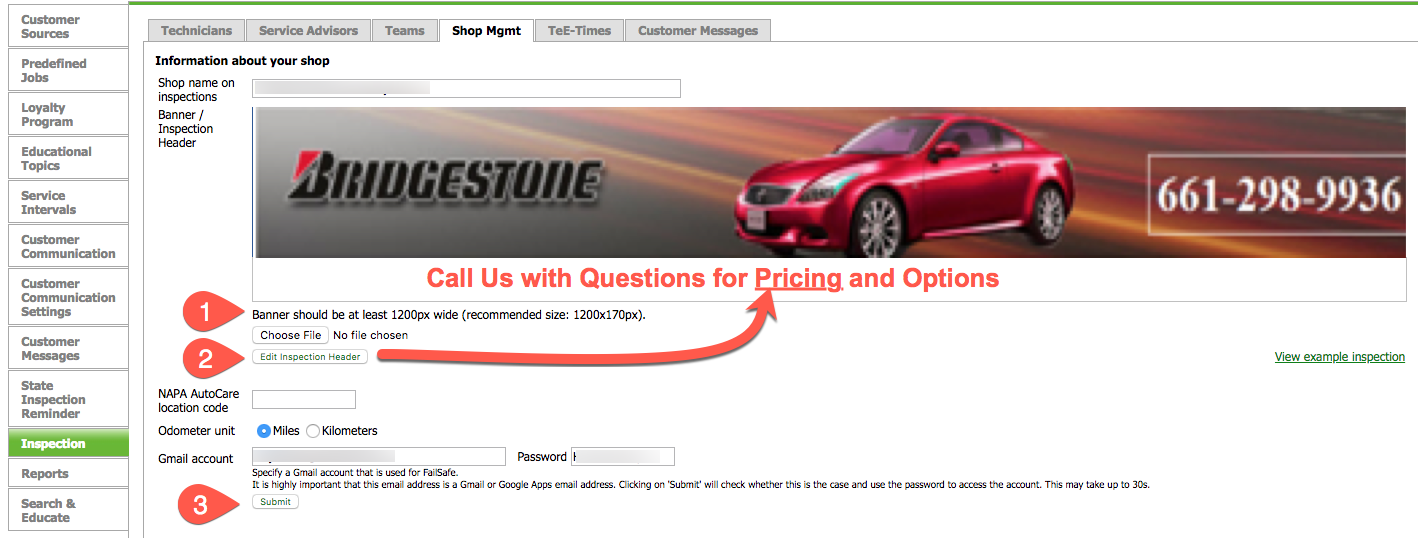
- Select the new banner to upload
- Edit any HTML text you want to add as a title to the banner (allows you adding links, colored info etc.)
- Submit the new Changes
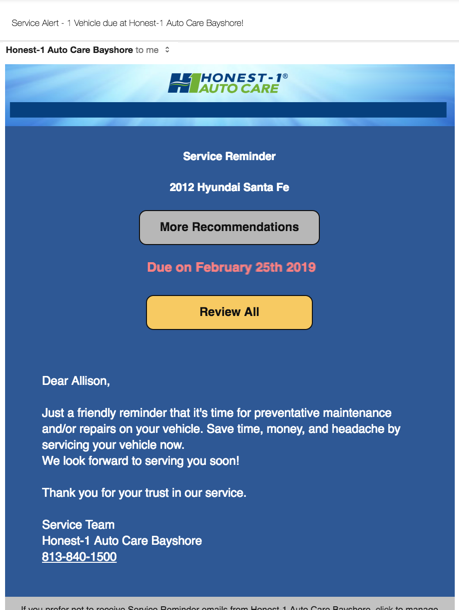
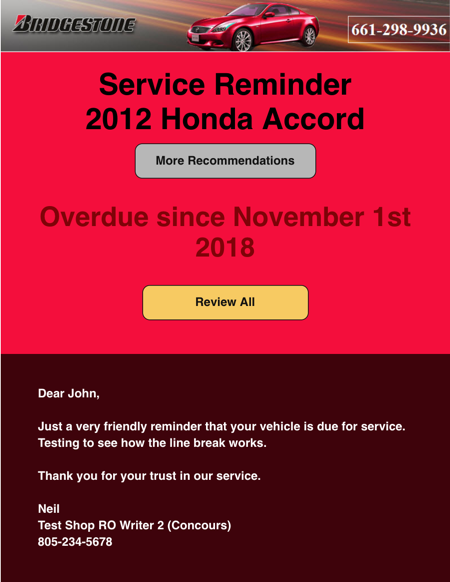
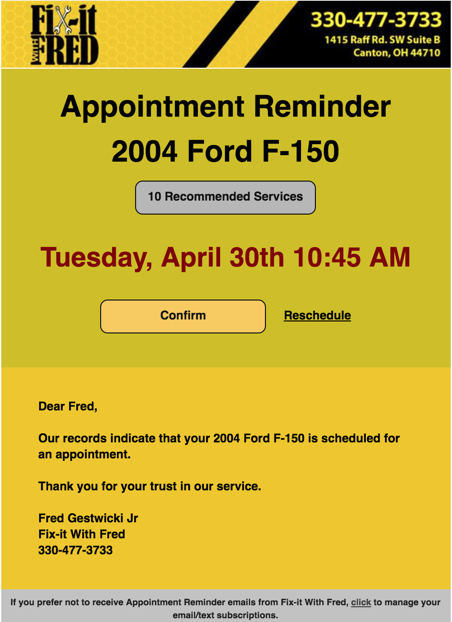
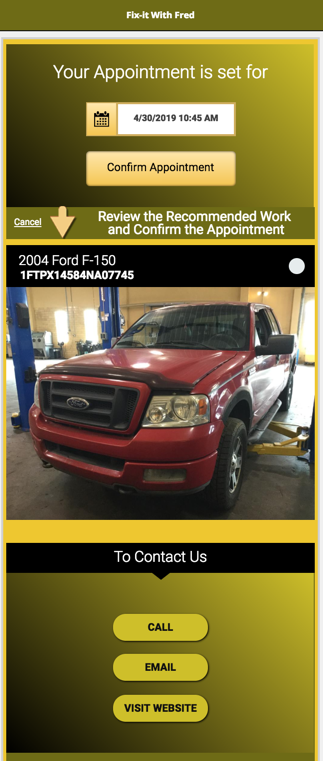
Below are typical examples of different types of messages to the customer with different color palettes.
- A service reminder email
- Another service reminder email
- An Appointment Reminder Email
- The Landing Page for the Appointment Reminder
- An Inspection Result Header on the Desktop
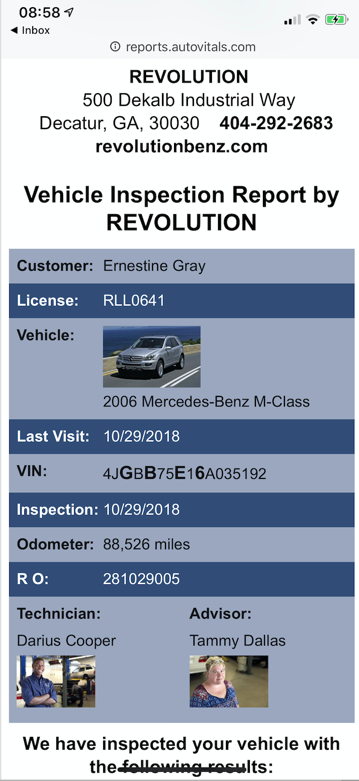
- An Inspection Result Header on Mobile
[powr-comments id=50287f2a_1540847961]
Didn’t Find what you were looking for?
- Release Notes V6.0.52 (TVP.X) and V5.0.58 (TVP Legacy) - October 23, 2020
- Release Notes V6.0.50 (TVP.X) and V5.0.57 (TVP Legacy) - October 11, 2020
- Release Notes V6.0.47 (TVP.X) and V5.0.56 (TVP Legacy) - September 26, 2020