
Turn your Phone to Landscape
![]()
Often motorists don’t have the time or budget to take care of all recommendations in one visit or parts are not available the same day. This leads to multiple visits to your shop and applying the 100% inspection rule can often mean a lot of additional work just to create the same results as the previous visit.
Introducing the New Carry-Forward feature. Once activated, it will automatically copy all inspection results from last time to the inspection sheet, so the techs will only need to adjust new findings, and all other topics will show conditions from the previous visit.
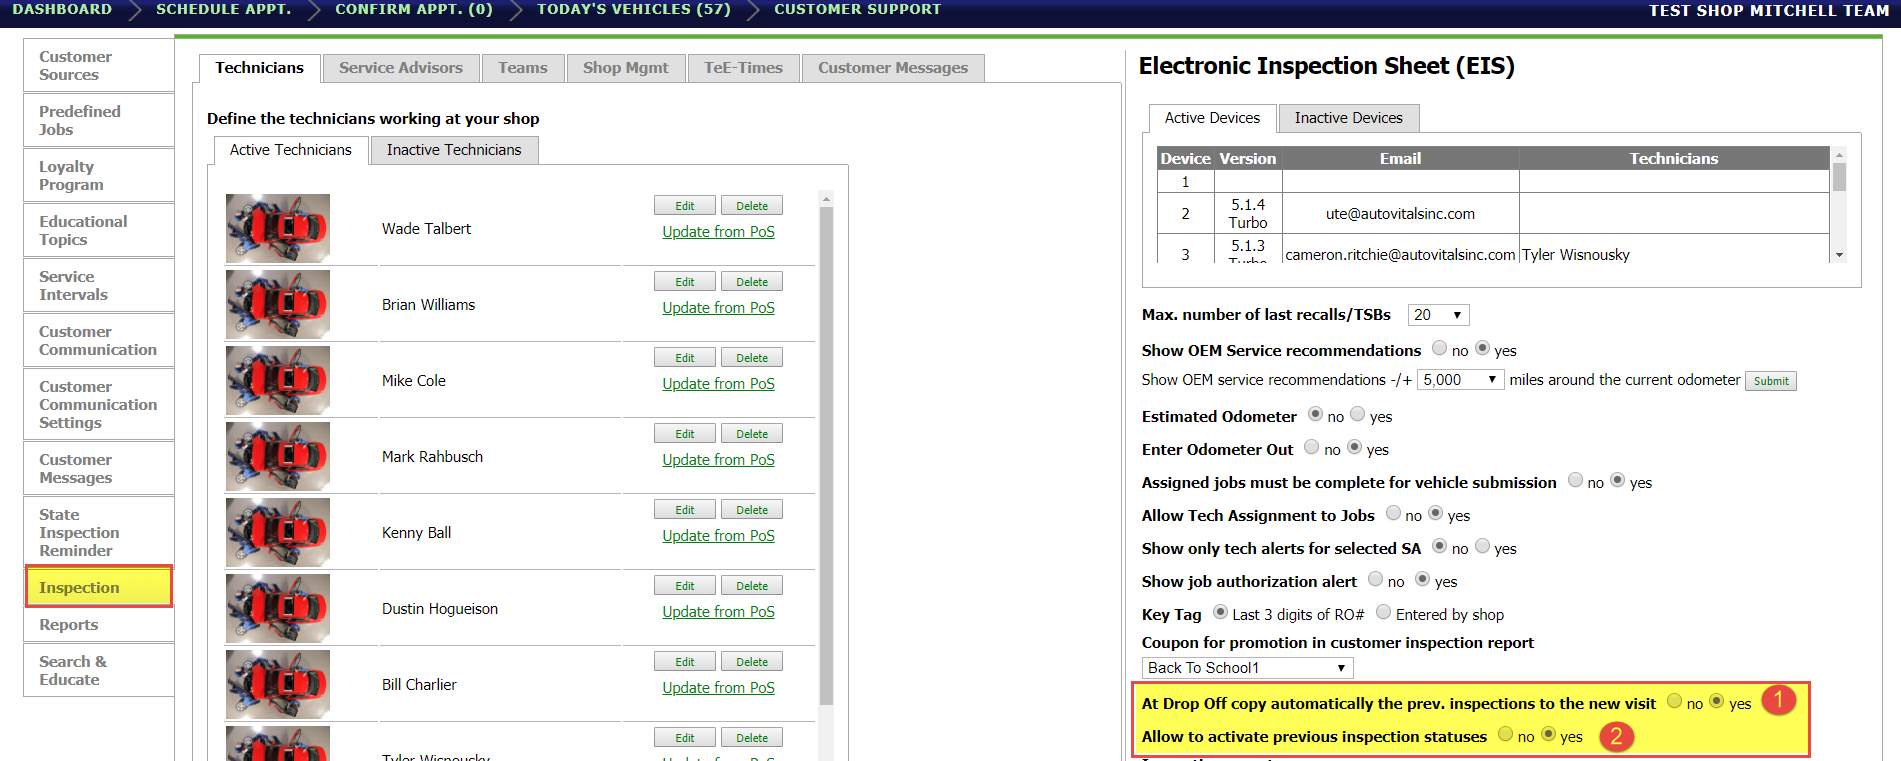
To turn on this feature, please go into the Inspection Settings, then navigate halfway down the page to find the highlighted settings.
The first on the list (#1) enables the whole carry forward feature. This means that when the vehicle hits the “Drop Off” workflow step, all of the previously filled out inspection data is carried over (statuses are inactive).
The second setting (#2 ) controls whether or not the Service Advisor sees an “Activate Previous” button.
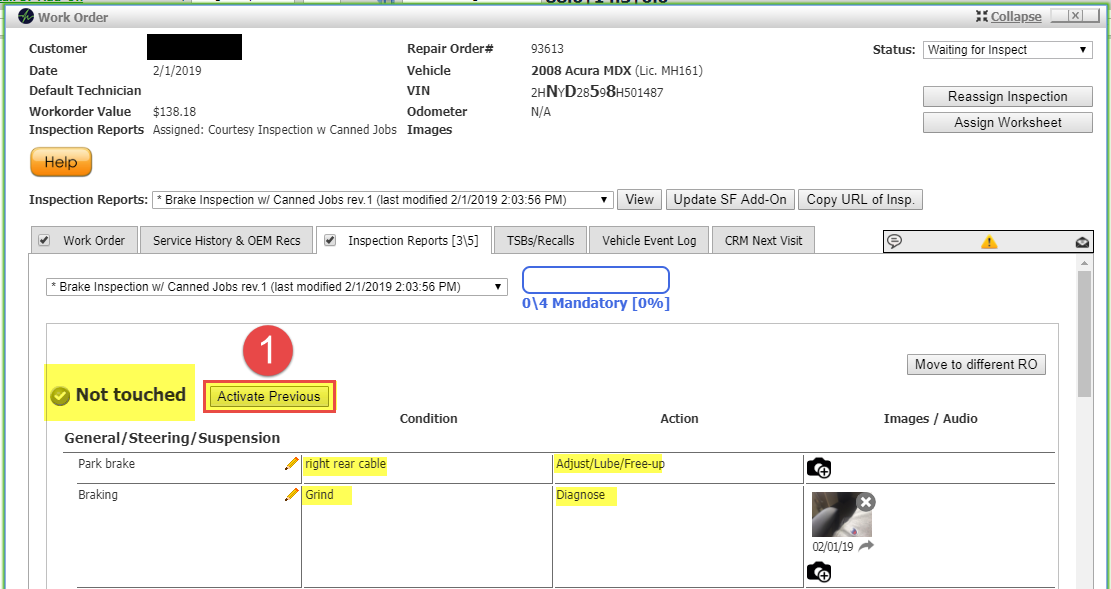
Here is the “Activate Previous” button that populates if the setting is enabled. If this button is pressed, ALL of the “Not Touched” topics will be re-activated with their previous statues.
All aspects of this feature work only in conjunction with the vehicle moving IN and OUT to and from the “Waiting For Inspect” Workflow step. The Image below shows the steps:
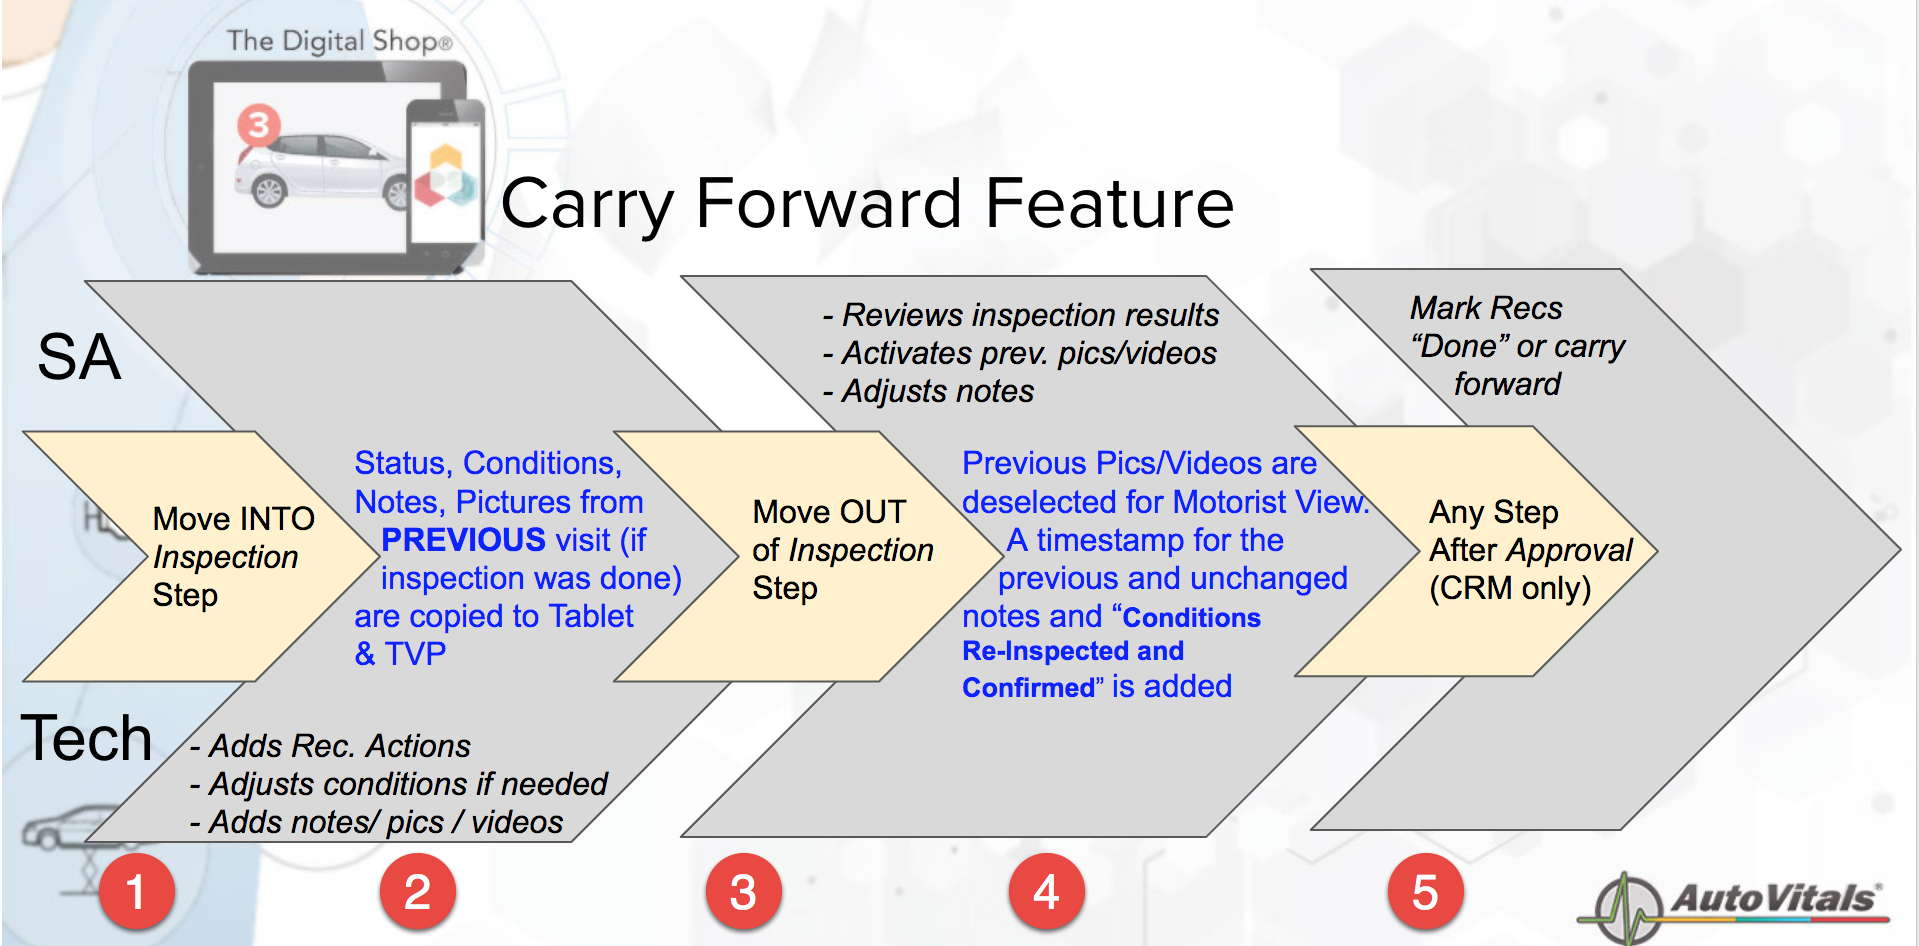
Note that this process doesn’t kick in if there is no inspection done at the previous visit.
-
The process gets started when the vehicle is moved into the inspect workflow step
-
The tech will see the previous inspection results and all conditions, recommended actions and pics are available like the inspection had been performed already. All statuses are missing and need to be done by the tech to confirm that the inspection has been done. The counter of the topics is reset to 0. New images and conditions and notes can be added as well or any aspect of the inspection.The SA sees the statuses reset but all conditions, notes and actions and images/videos (see below).
 Once the Tech is done inspecting and hit the save button or the smart alert button for the job line inspection, the inspection sheet gets updated for the SA. The SA could now press the “Activate Previous” button (if configured) and all topics not touched by the Tech will have the status updated and the pictures/videos made visible to the Motorist.
 -
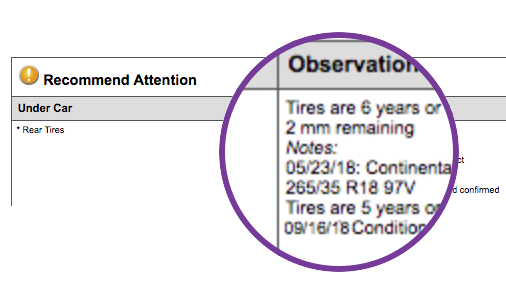
The SA will move it out of the inspect workflow step into the Estimate step typically. This will add the timestamp to all conditions/notes, which stayed untouched from the previous visit. In addition, the note “Conditions re-inspected and confirmed” is added to any topics that were simply re-confirmed by the technician.

4. The SA reviews the inspection results and selects the images for the motorist to see and modifies the inspection results as needed. A typical inspection topic visible by the motorist might look like the one below.
Once activated, this feature enables unprecedented efficiency gains while inspecting vehicles. All of the previous information from the prior inspection will be carried forward as soon at the vehicle hits the “Drop Off” WorkFlow step. However, the statuses will not be active until either:
-
Technician goes over the topic and marks the topic as “confirmed” OR they change the previous conditions, status, and/or action to account for any changes.
-
Service Advisor uses the “Activate Previous” button (if enabled
Here is a view of the technician’s tablet when prior inspection information is carried forward into the current visit. We have changed the interface so that the technician can improve efficiency in confirming, modifying, and having better overall awareness of carried forward topics. With this change, all contextual documentation is readily available without any extra taps. This includes but is not limited to an Image Stream, Image Captions ,Shop Notes and Customer Notes. Furthermore, the technician can activate the previous status with one tap and has indicators that distinguish topics with info carried forward.
Here are the best practices for the tablet:
1. Re-Confirming
-
- To re-confirm the previous status of a topic is now easier than ever using the “Re-Confirm” button. Follow along on the video below to see just how easy it is to reactive last visit’s status.
2. Changing Status
- Changing the previous status is as simple as selecting the new. As soon as the status is changed, all of the previous data will be overwritten including conditions, actions, and notes. Be sure to document the status change with all necessary notes, images, and captions!
3. Marking “Good” Status
- Marking a topic as “good” is now easier using the updated Carry Forward. Pressing the status icon on the menu once marks that topic as “good”. Click below to see this new feature in action!
Glossary
-
Blank Status Icon – #1
-
The blank status icon serves two purposes: marks topic as “good” with one tap, also shows user that the topic is not complete i.e. no status has been selected.
-
-
Dark Gray Topic Header – #2
-
The topic header turns dark gray when selected, the topic name will also be displayed on top left-hand corner of the new interface
-
-
Underlined Topic Name – #3
-
This indicates that the topic had information that was carried forward from the previous visit
-
-
Inverted Topic Header – #4
-
Once the topic is complete, the topic header displays the active status icon
-
-
Confirm Button – #5
-
This new button activates the previous status. When the button is pressed by the technician, the colors invert (similar to completed topics), indicating that the topic has been re-inspected and confirmed.
-
-
Image Stream – #6
-
The image stream is now available without any extra taps. Technician can swipe left or right to navigate or simply use the arrows to the left and right of the image.
-
-
Image Captions – #7
-
Image captions will be displayed here and will match up to the image shown in the Image Stream
-
-
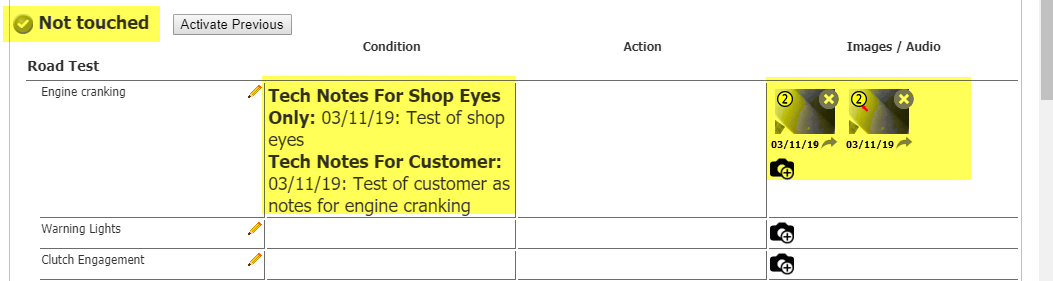
Topic Notes – For Shop Eyes – #8
-
Notes for the For Shop Eyes will be displayed in this text box when the navigational button color matches the text box. In the example above, the For Shop Eyes notes are shown.
-
-
Topic Notes -For Customer – #9
-
Notes for the For Customer will be displayed in this text box when the navigational button color matches the text box. In the example above, the For Customer notes are hidden until the technician selects them.
-

Didn’t Find what you were looking for?
Latest posts by carlo (see all)
- Alerts for Coaches in BCP - April 19, 2021
- Release 3/27/21 - April 1, 2021
- Release Notes V6.0.96 (AutoVitals.X) - December 5, 2020