Let Visuals Tell You the Vehicle Status
Smart Markers have been a huge success on the previous version of the Today’s Vehicle Page (TVP). We made them even more powerful. The image below gives an overview of all features.
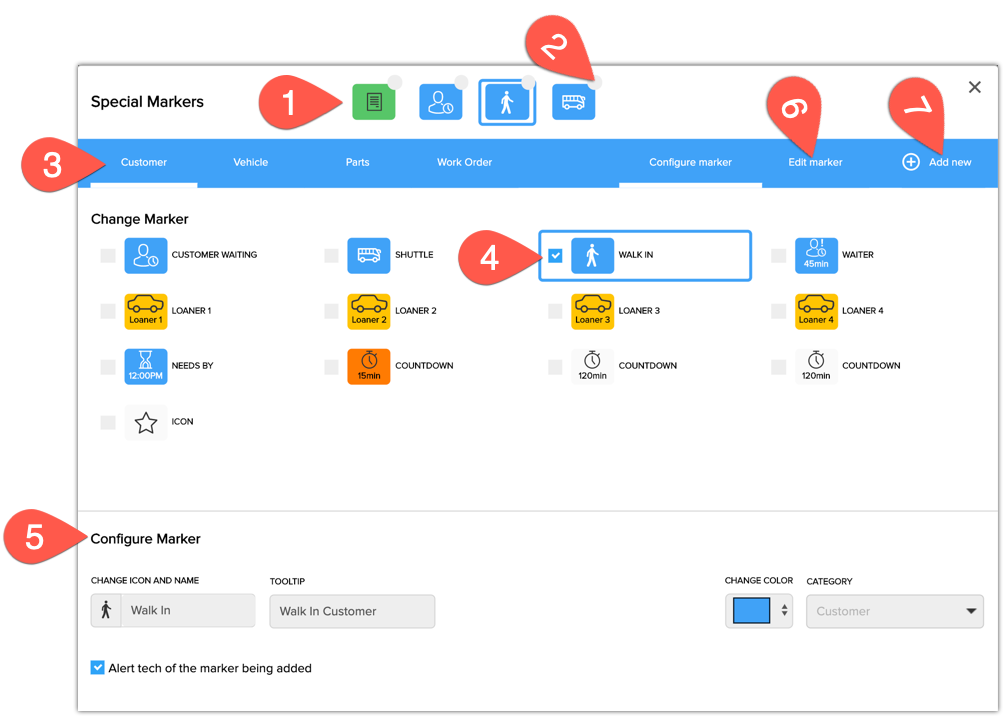
- There are 4 configurable smart marker spots available per vehicle tile. The markers are used to describe specific attributes of a work order, which are typically specific to the current visit.
- Checking the checkbox makes the smart marker permanent across visits.
- Smart markers can be specific to Customer, Vehicle, Parts, and Work Order.
- After you have selected the position of the marker in step 1, you select the type of marker by checking the checkbox.
- On the bottom panel you can configure all attributes of the selected marker.
- Not quite finding the marker you need? Redefine an existing one, or
- Create a new smart marker
How to automate the addition of a smart marker or inspection based on a canned job in the point of sale
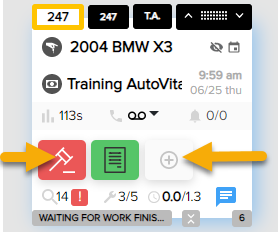
- Open the Smart Marker Configuration window by clicking on any vehicle’s smart marker or button to add a special marker
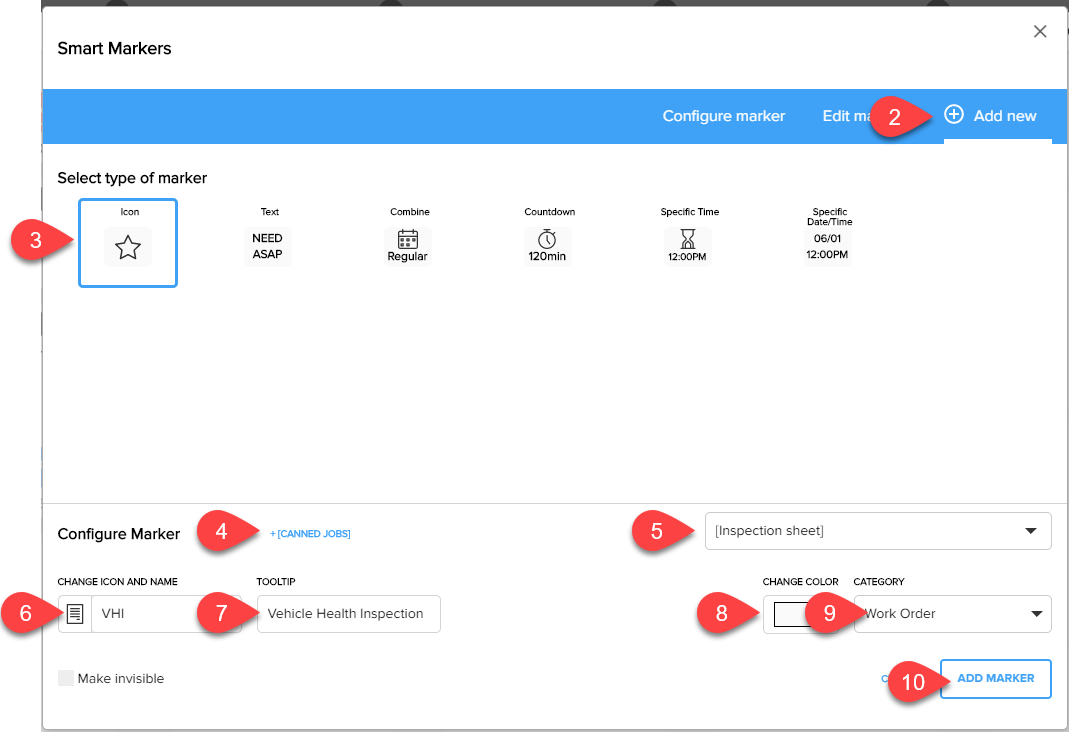
- Click Add New (or Edit Marker if the marker you want to add the automation to already exists)
- Select the “Icon” marker type
- Choose the canned job that should trigger the addition of the smart marker
- Add an inspection sheet if the canned job should also trigger the addition of an inspection to that labor line for the technician
- Name the Icon (that appears when manually adding the smart marker on the Today’s Vehicle Page (TVP)
- Name the tool tip that appears when hovering over the smart marker
- Select a color for the marker
- Indicate which Smart Marker category this marker belongs in (Customer, Vehicle, Parts, or Work Order)
- Click Add Marker
Founder and CIO at AutoVitals
Latest posts by Uwe "Oova" Kleinschmidt (see all)
- Release Notes V6.0.52 (TVP.X) and V5.0.58 (TVP Legacy) - October 23, 2020
- Release Notes V6.0.50 (TVP.X) and V5.0.57 (TVP Legacy) - October 11, 2020
- Release Notes V6.0.47 (TVP.X) and V5.0.56 (TVP Legacy) - September 26, 2020