
How to Establish a Remote Connection on an iPad
iOS 11 adds the ability to establish remote screen sharing of a tablet – a useful feature for observing an error occurring on a tablet. The following guide will walk you through the steps to establish a screen sharing session, allowing your support analyst to easily assist with your tablet issue.
If you have trouble setting up the remote connection, please reply to your support ticket with the last step of this guide you completed.
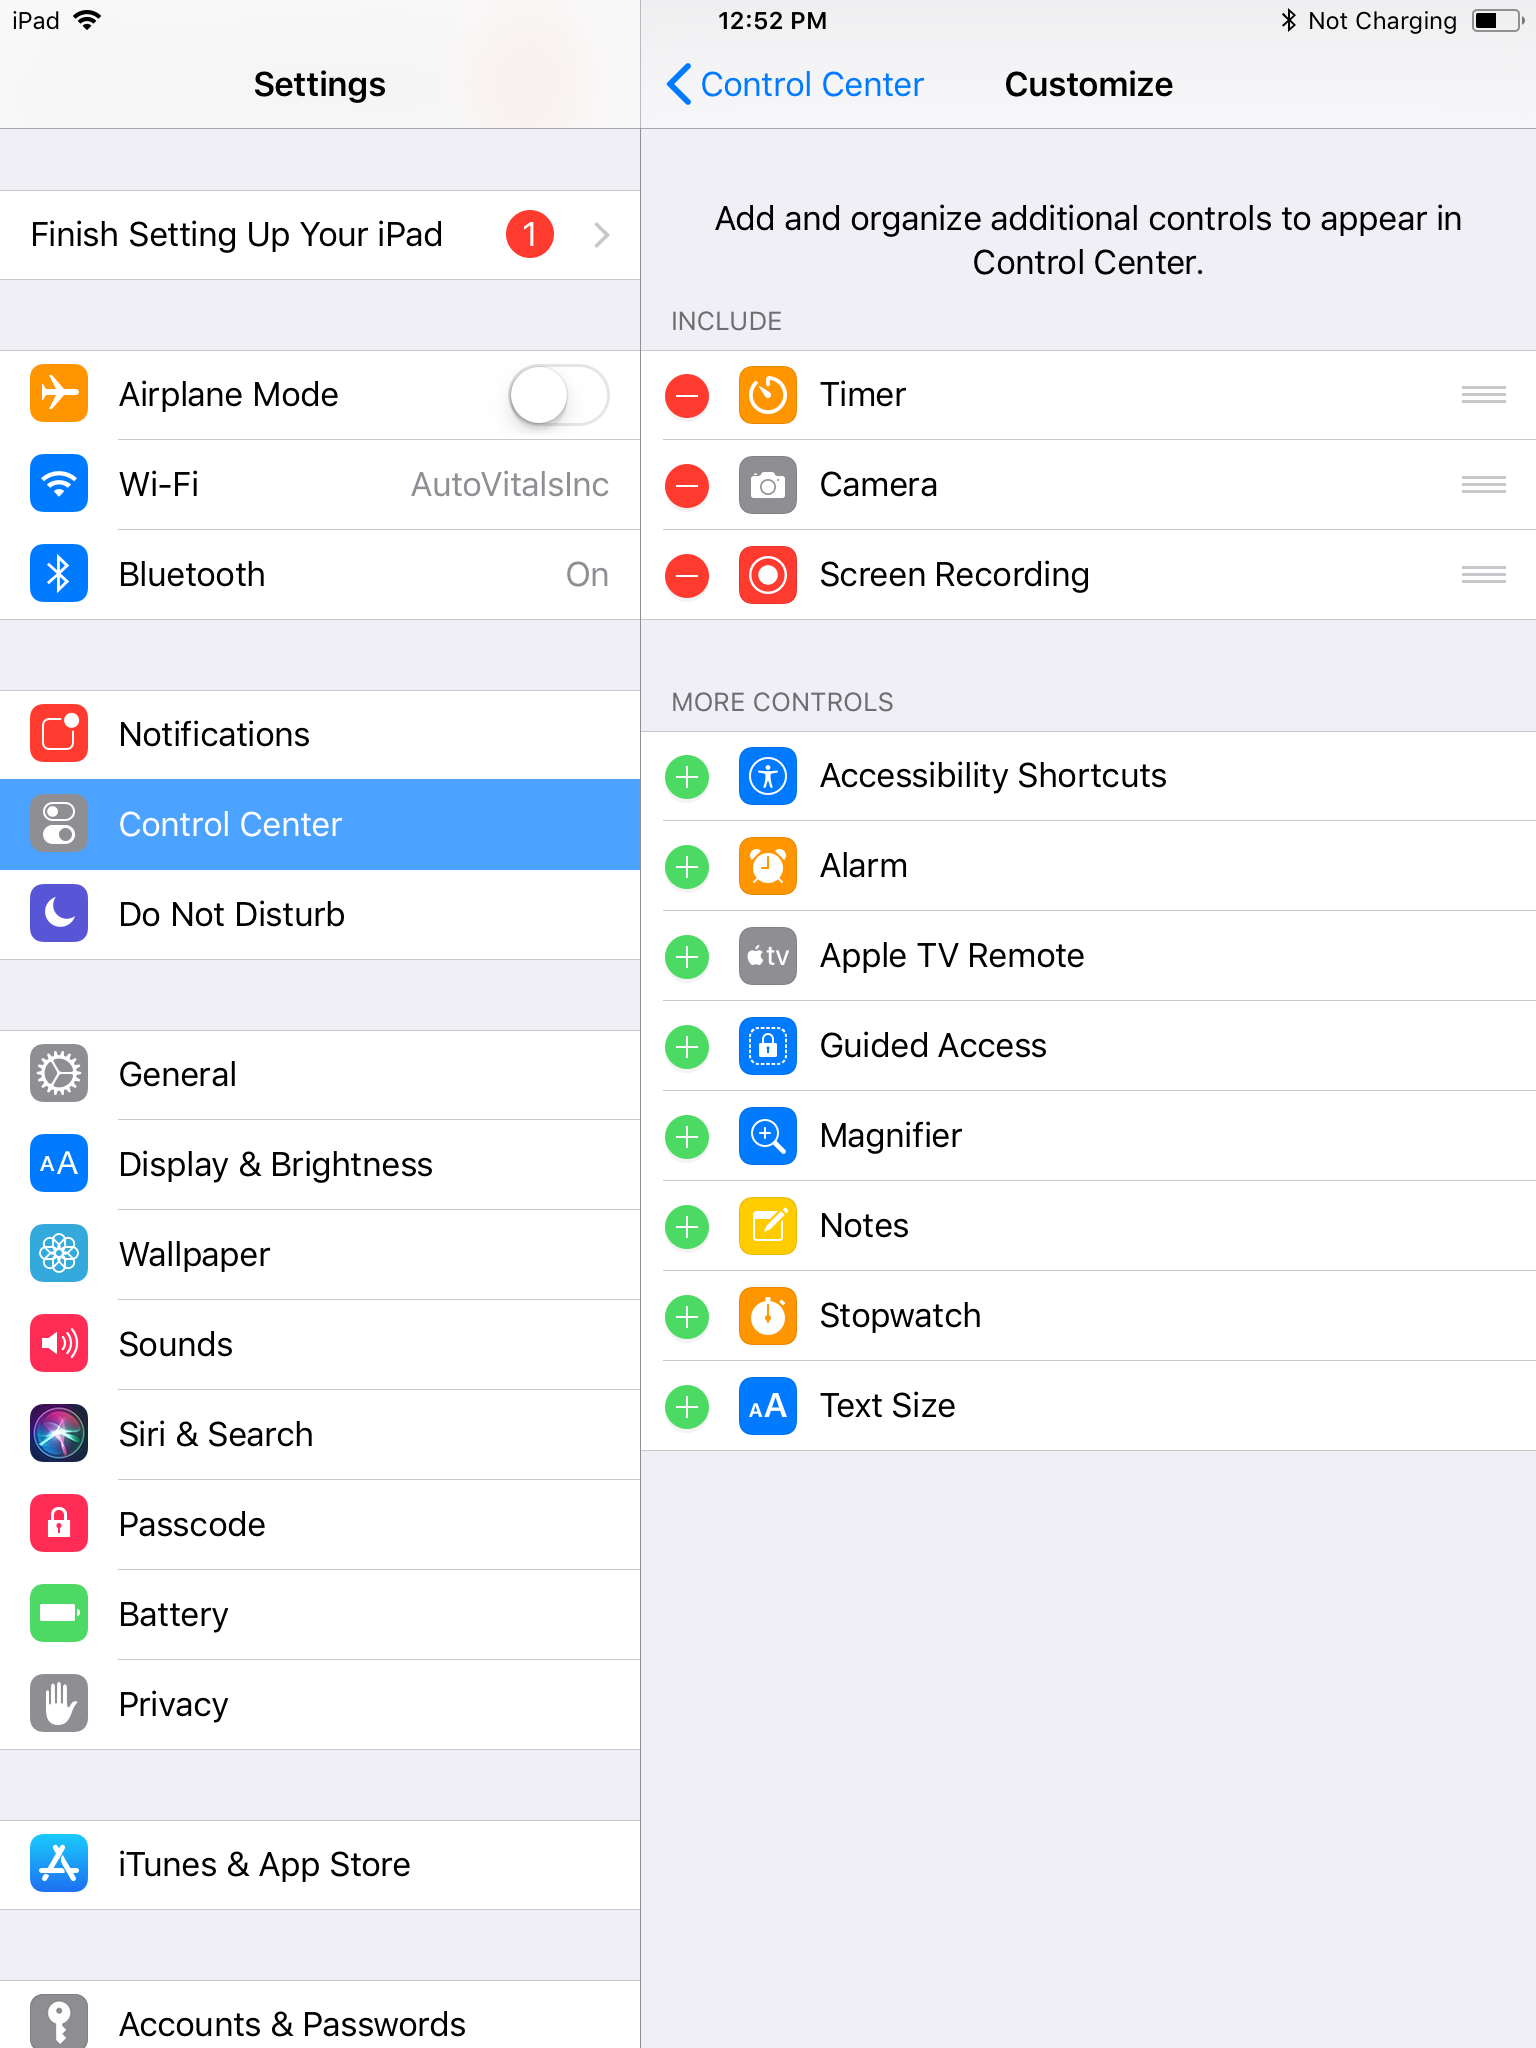
Step 1: Enable Screen Recording
- On your iPad’s home screen click on Settings.
- In the left column, click on Control Center> Customize Controls.
- A list of possible controls available for your control center will appear in the right column.
- Click on the green plus icon next to Screen Recording.
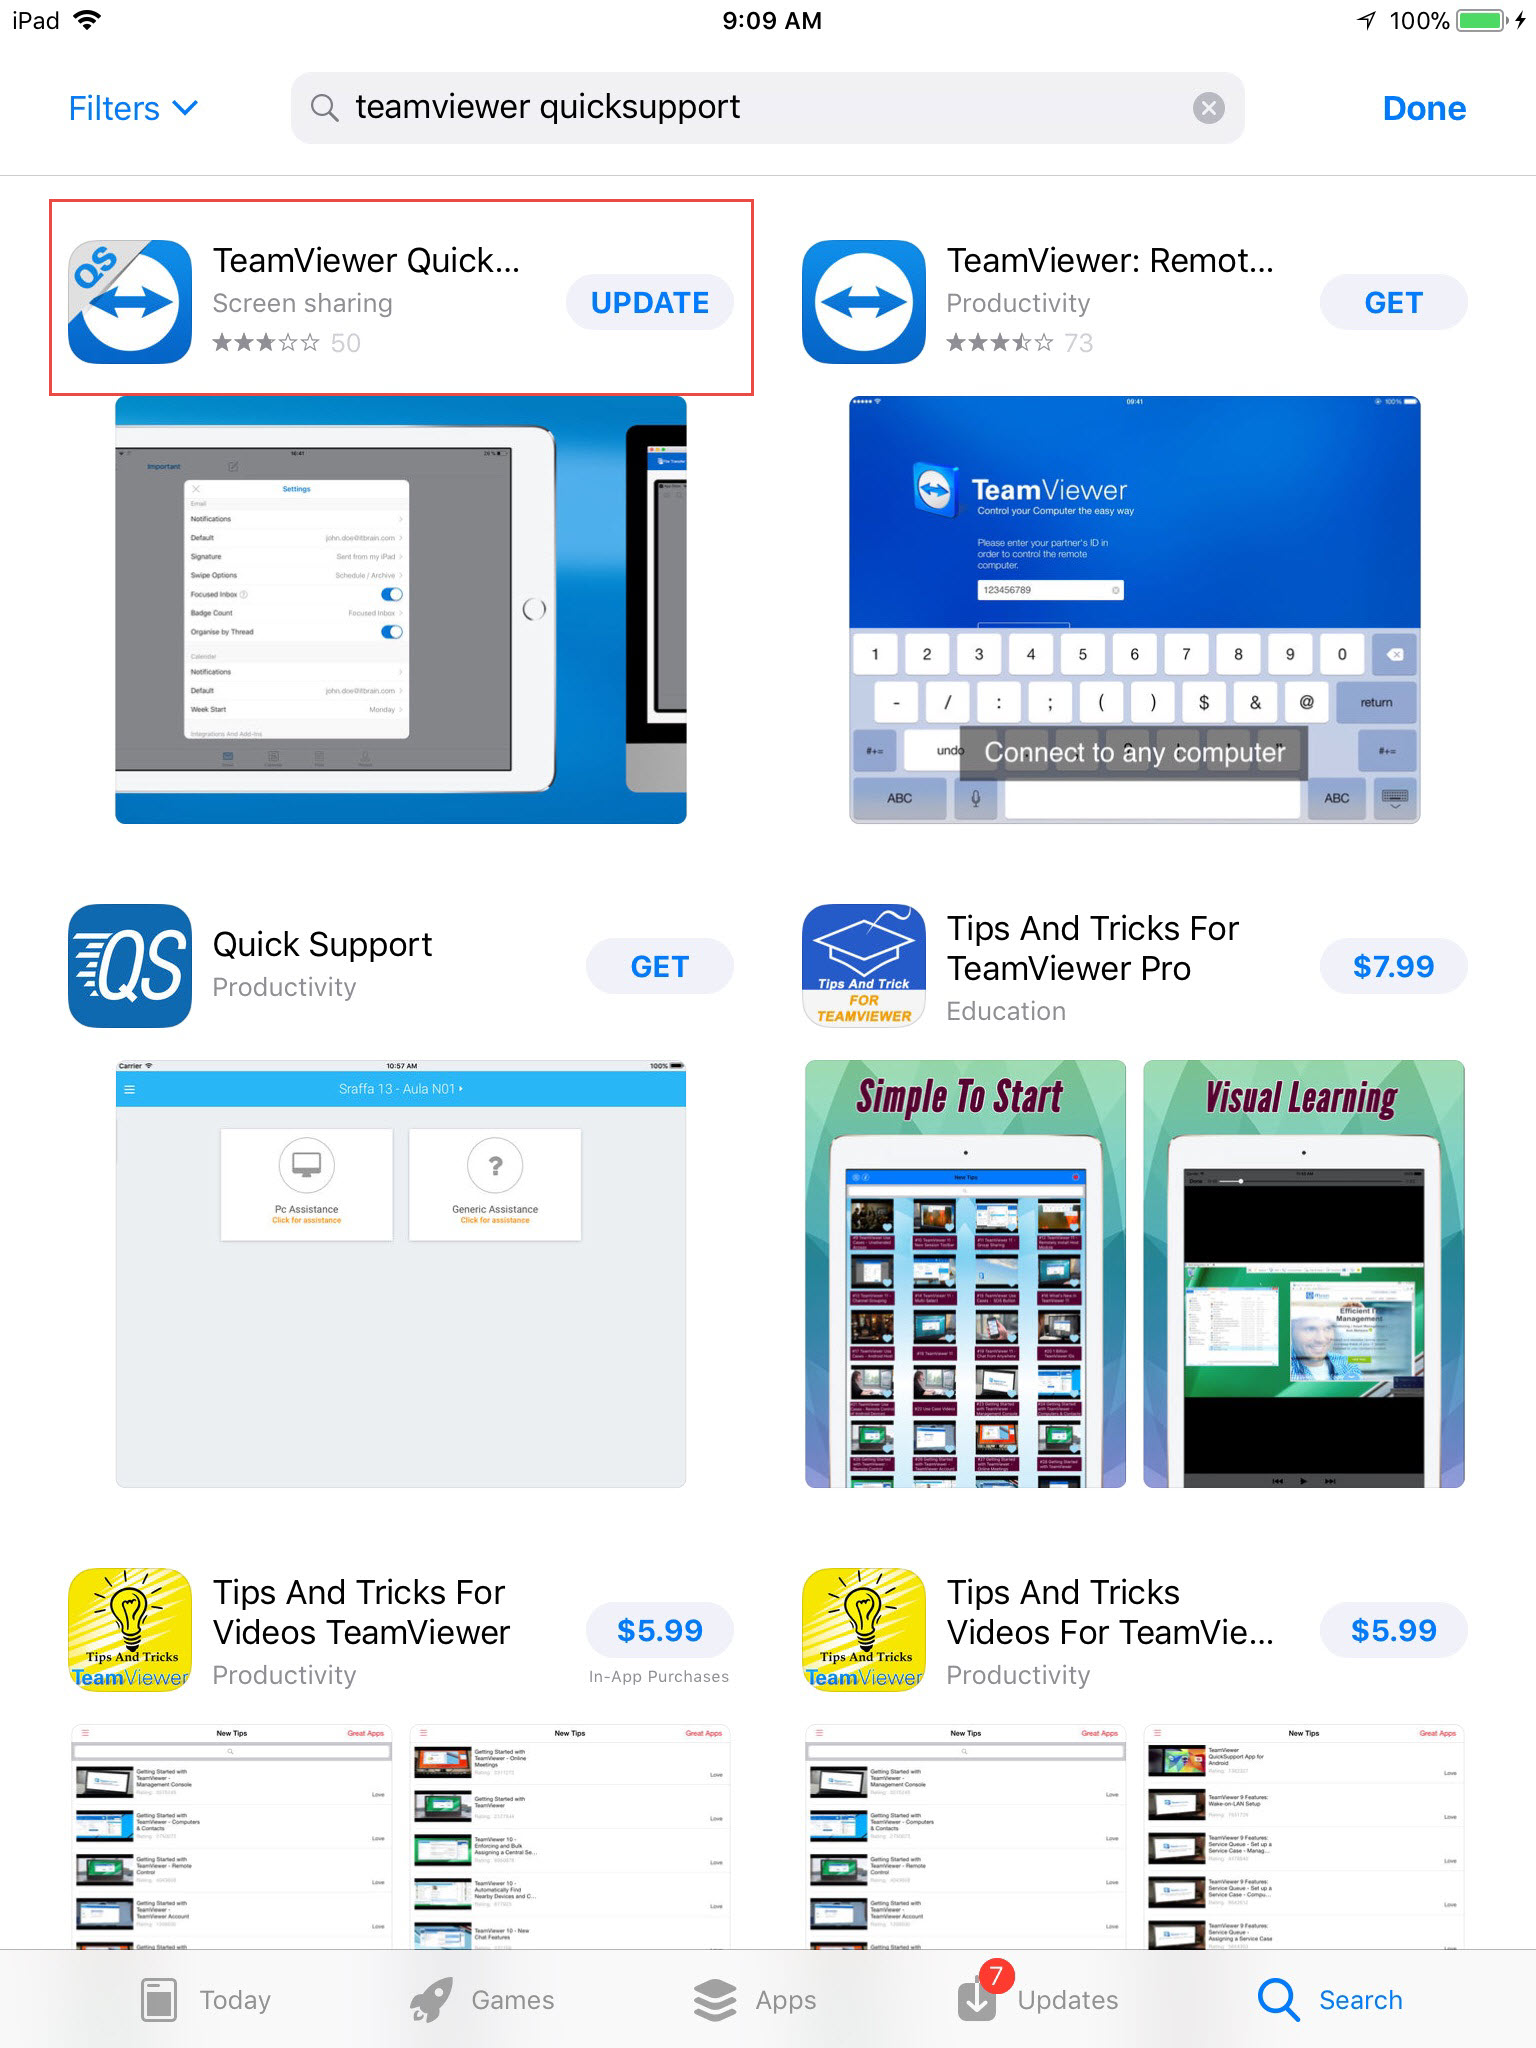
Step 2: Download TeamViewer QuickSupport App
-
- Open the app store and click on the search bar. (Bottom right on iOS 11, top right on iOS 10 or below.
- Search teamviewer quicksupport.
- Two TeamViewer apps will appear. You want TeamViewer Quicksupport (DO NOT install TeamViewer Remote Connection)
- Install TeamViewer QuickSupport by clicking GET. Once the program installs, return to the home screen.
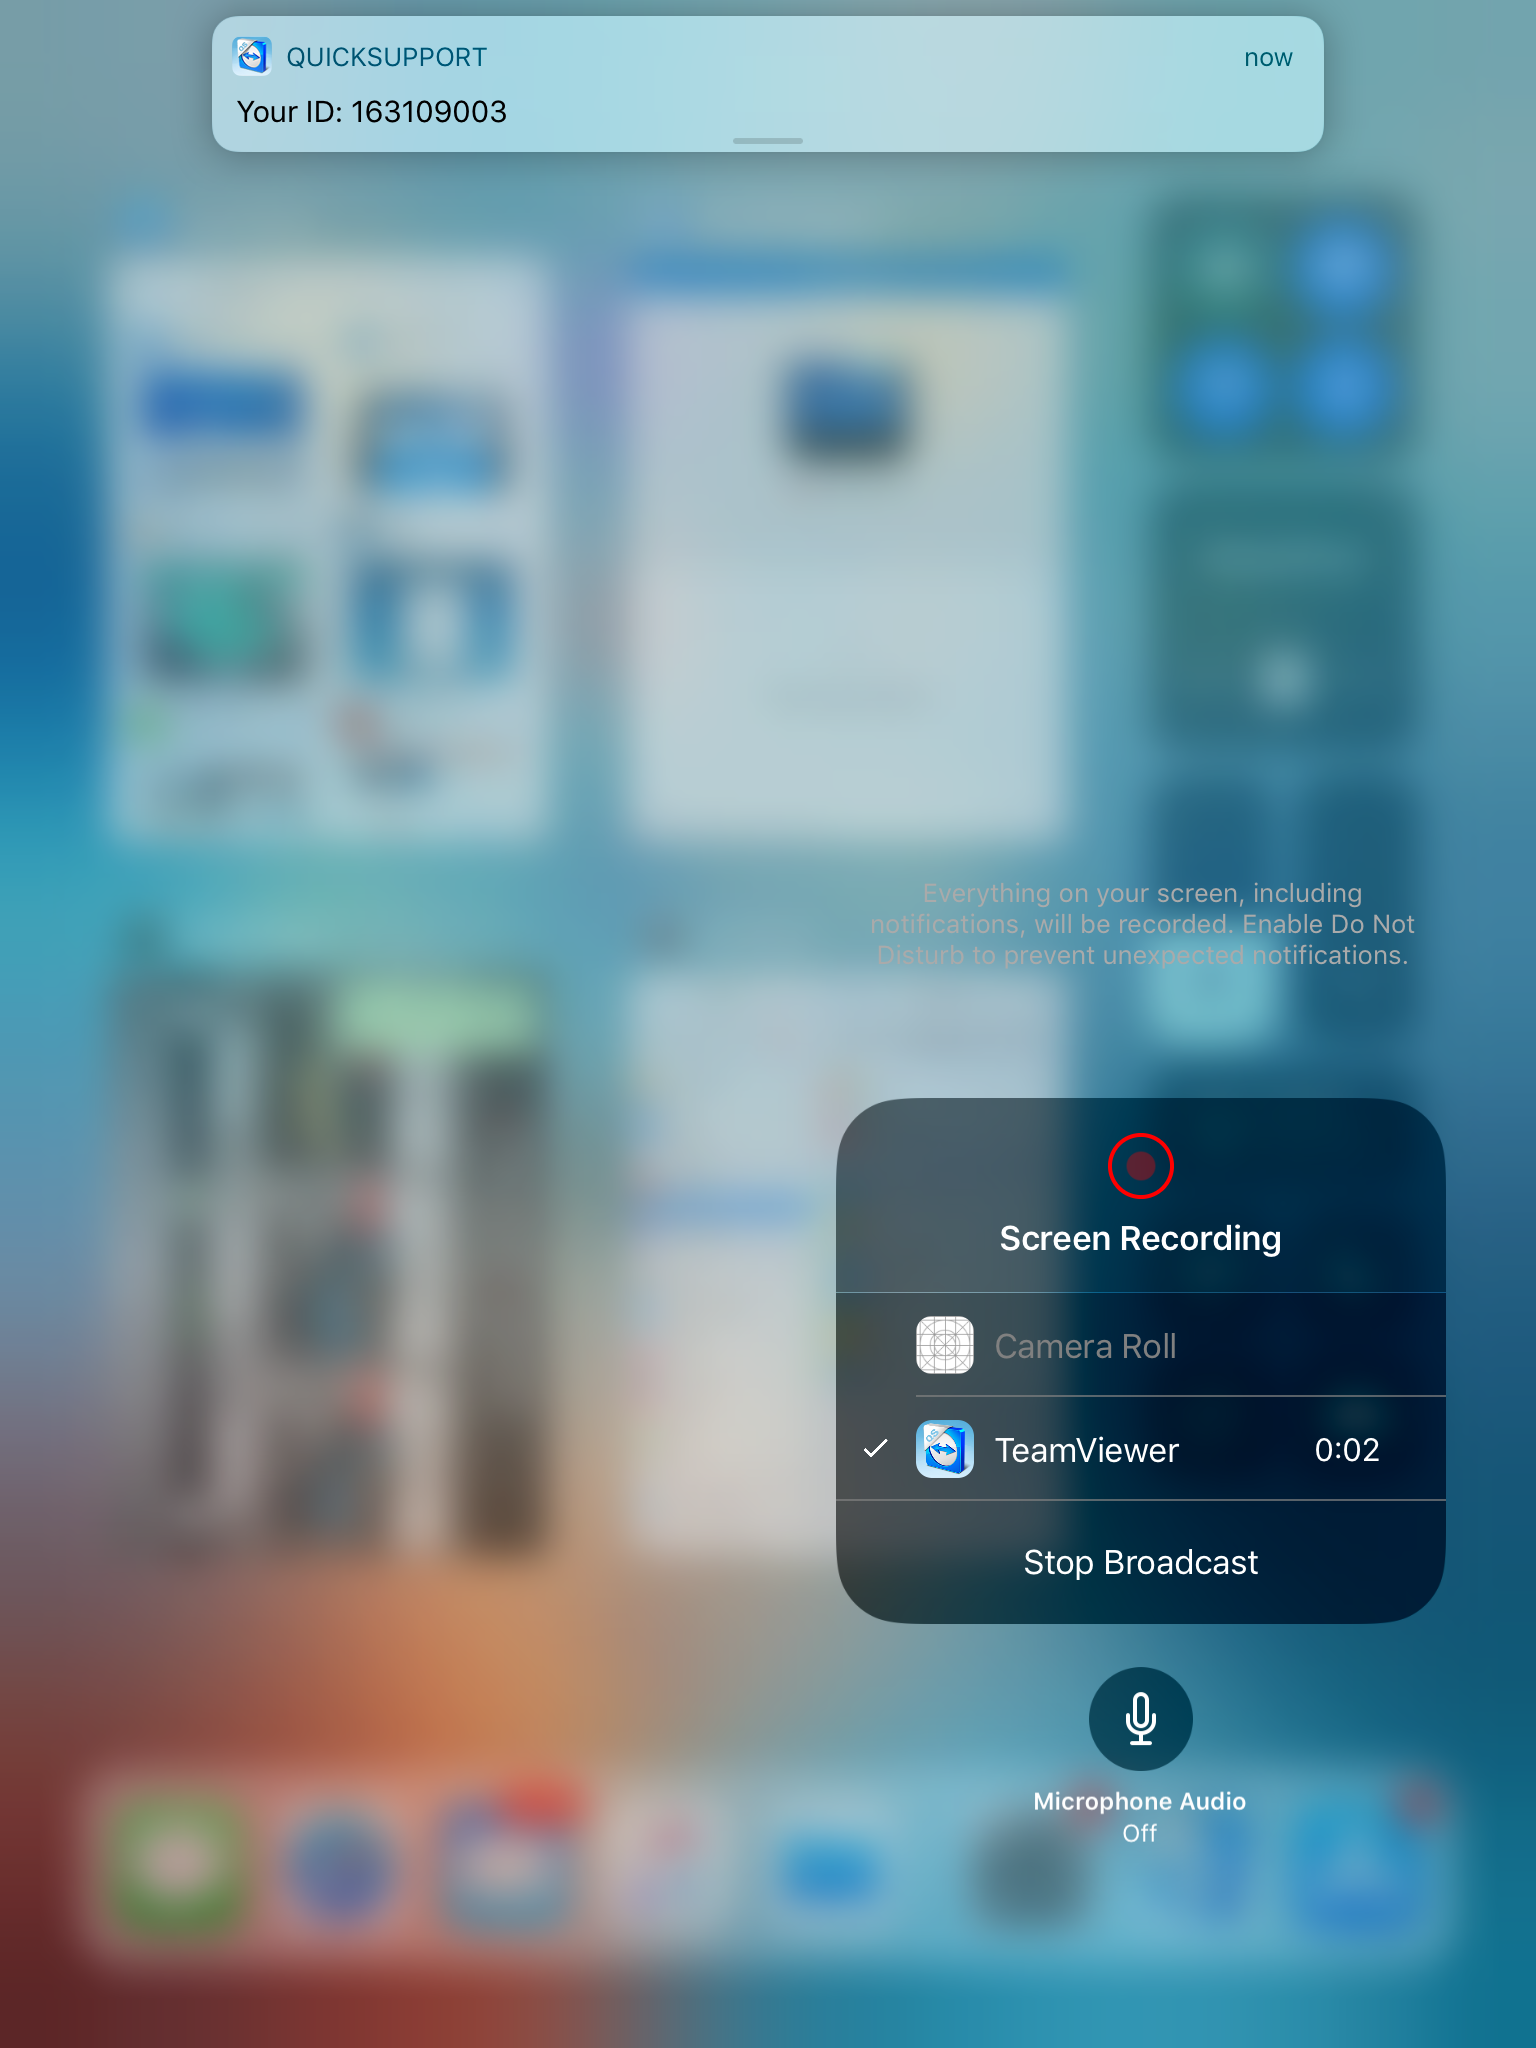
Step 3: Enable Screen Recording Pt. II
- Swipe UP from the bottom of the tablet screen
- On the right side of the screen is the control center panel. Look for the icon that is a thin white circle surrounding a smaller shaded white circle. Click and hold this icon until a pop-up menu appears.
- On the pop-up menu, click “TeamViewer.”
- Click “Start Broadcast,” then return to the home screen.
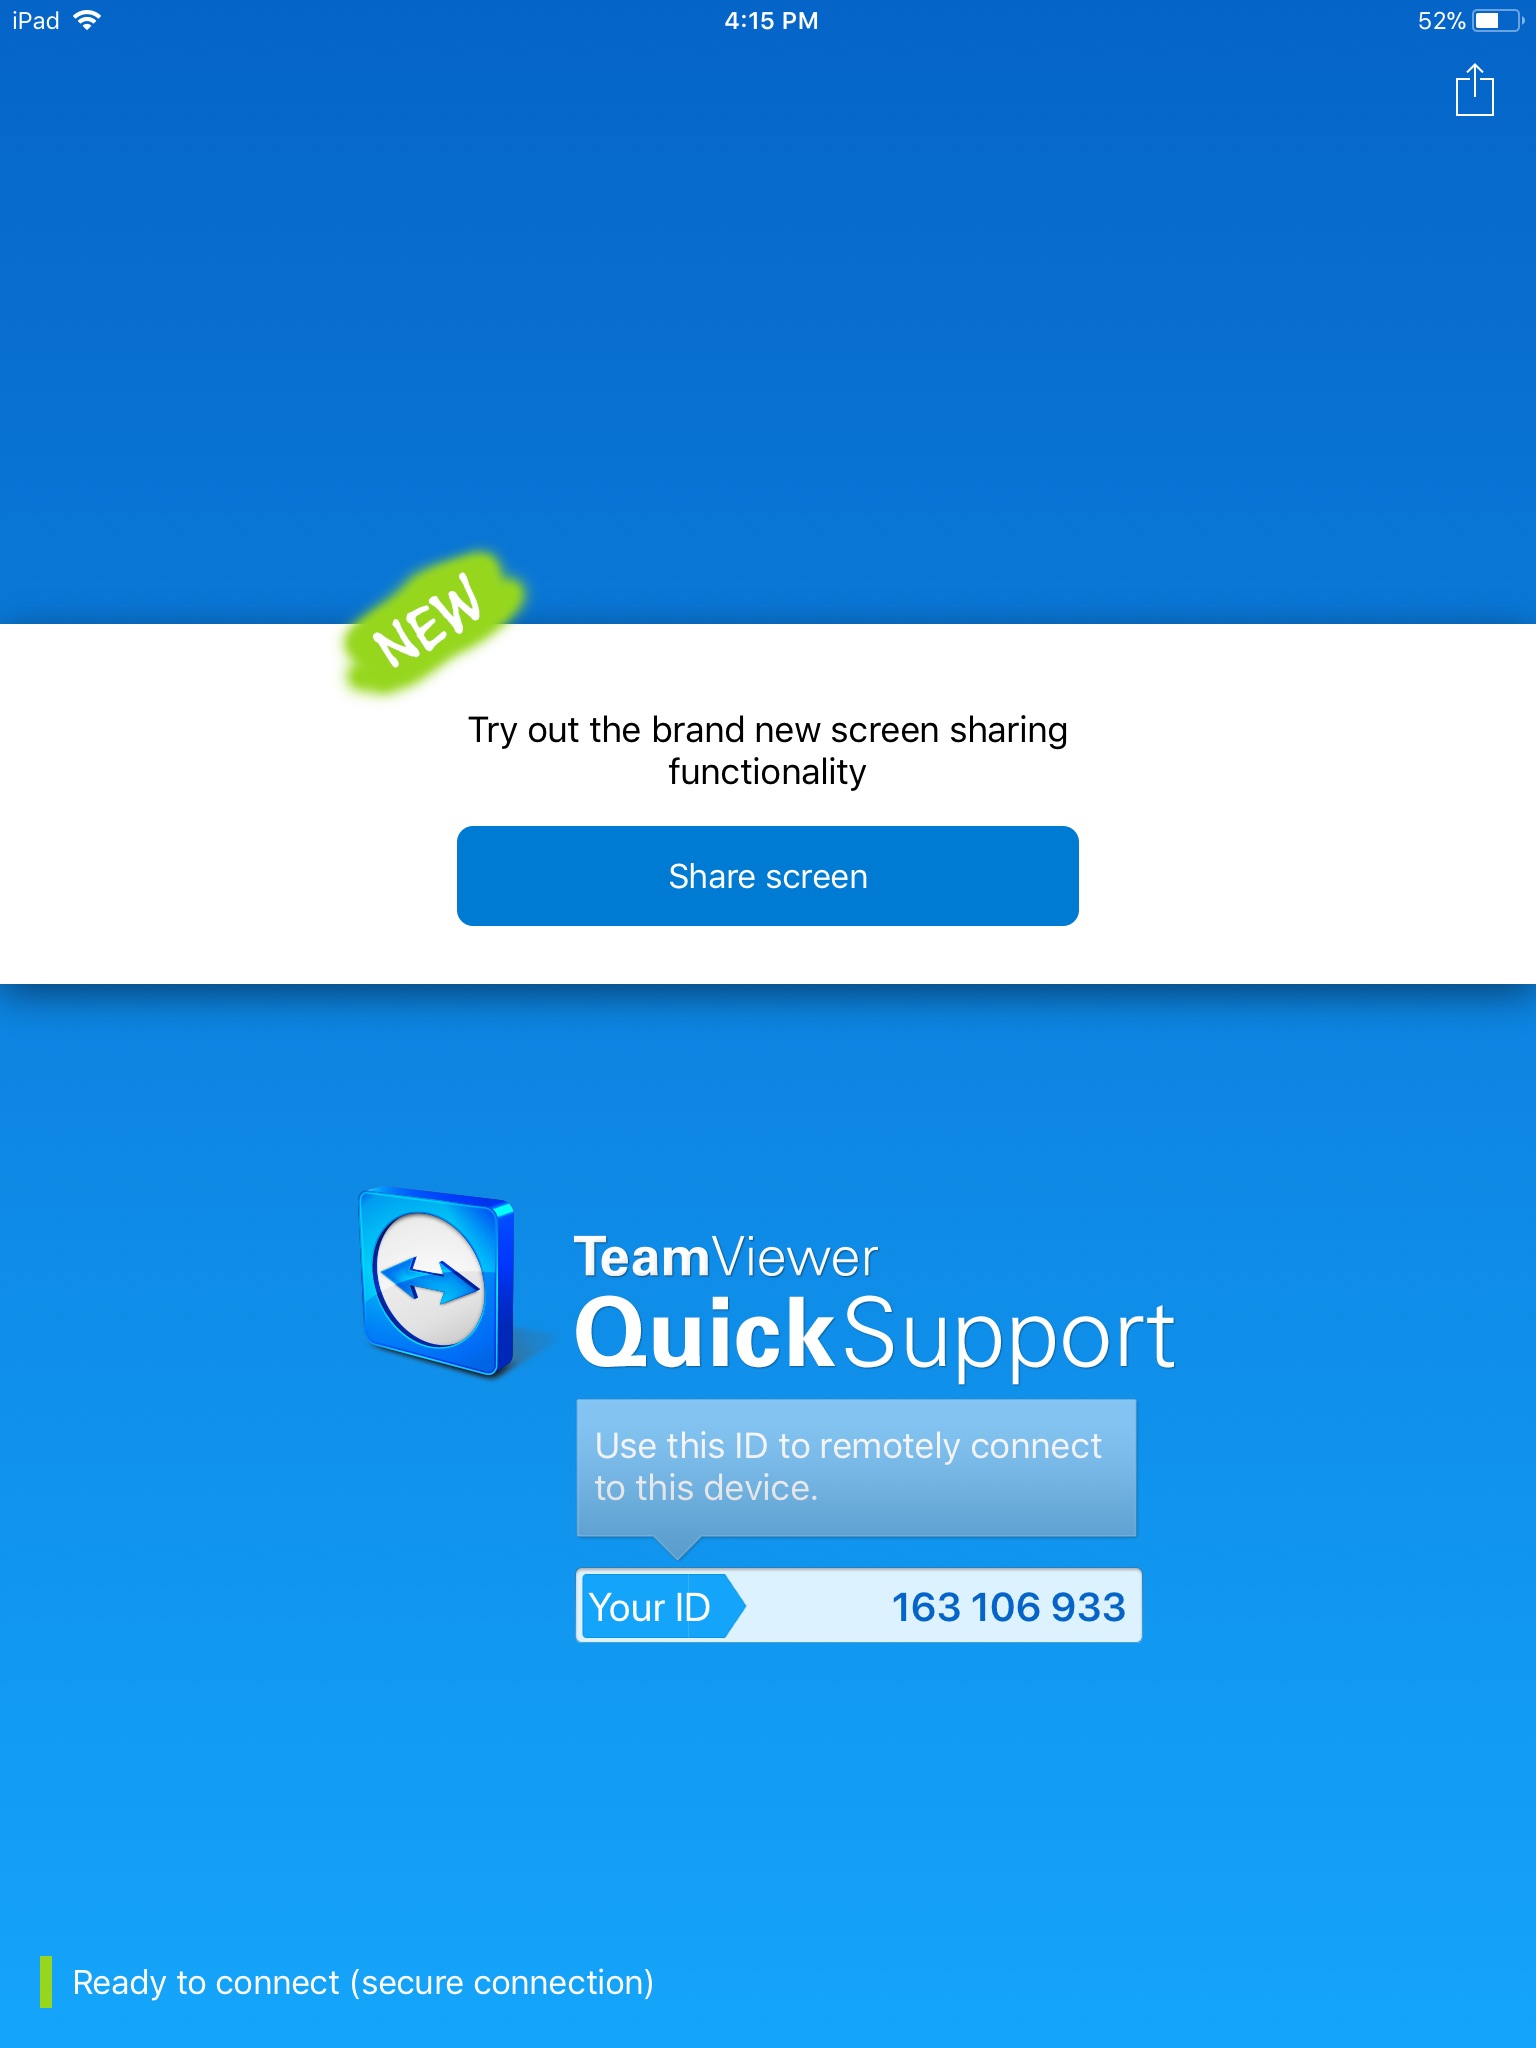
Step 4: Establish Remote Connection
- Open the TeamViewer QuickSupport app and click “Share Screen” Provide the ID that you see to your Support Representative. When our representative connects, make certain you click “Allow” on the pop-up window that appears.

Latest posts by brian (see all)
- How to Install the Latest Turbo Version of the SmartFlow App - December 15, 2017
- How to Install the Latest Standard Version of the SmartFlow App - December 15, 2017
- How to Take a Screenshot Using Windows Snipping Tool - December 8, 2017