
Turn your Phone to Landscape
![]()
Special Markers On Steriods
Special Markers have received so much attention and thousands of customized markers have been created by SmartFlow users that we added more and more features to them. This article shows how to
- Create Special Markers
- Turn Special Markers into Smart Markers
- Makes them last across visits
- Organize them and pick the ‘First Choice’ ones
- Makes them invisible when using only for mapping jobs and inspection sheets
- Define your own
- Use Timers and Clock features for your own, customized markers
- Setup Special/Smart Markers
- Organize Special Markers
- Link Inspection Sheets to Job lines on the RO
- New: Make Markers Visible/Invisible
- Create Permanent Markers
- Use timers and clock values as well as tech notes
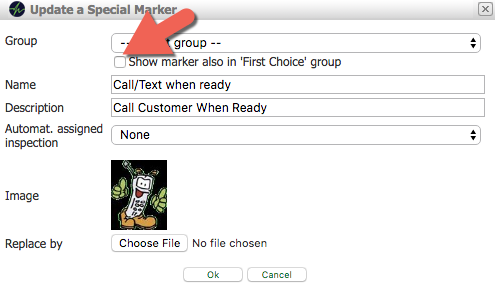
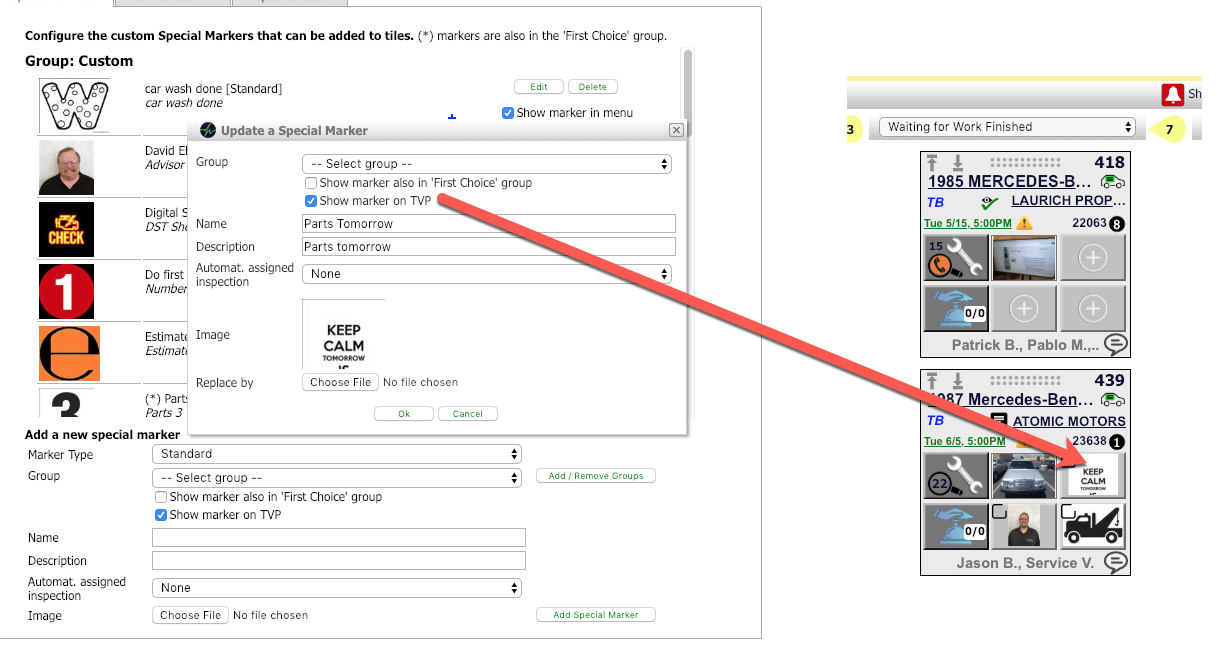
How to create/organize Special Markers
- Create a new group
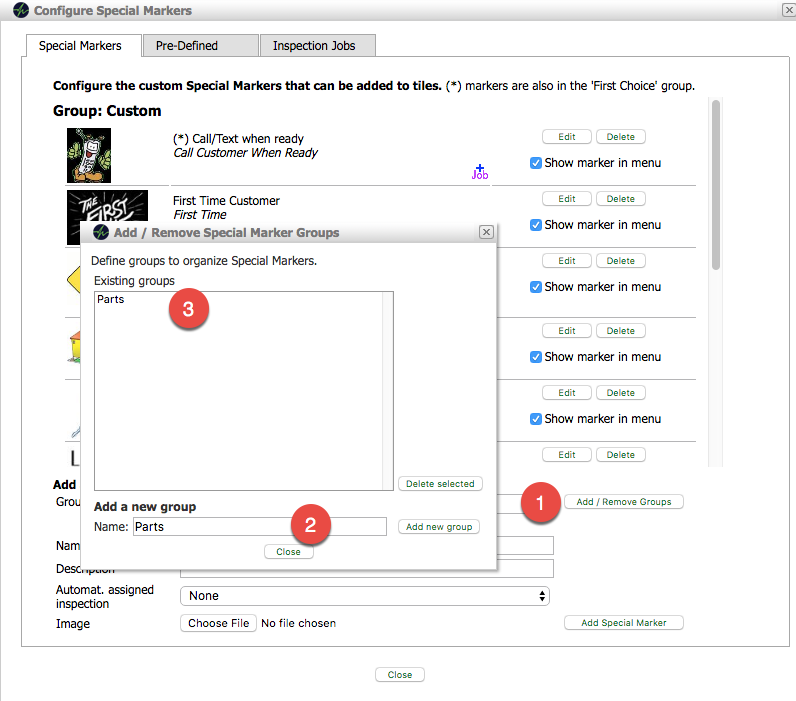
- Create a new marker and select the group as their new home (or hit edit for an existing marker)
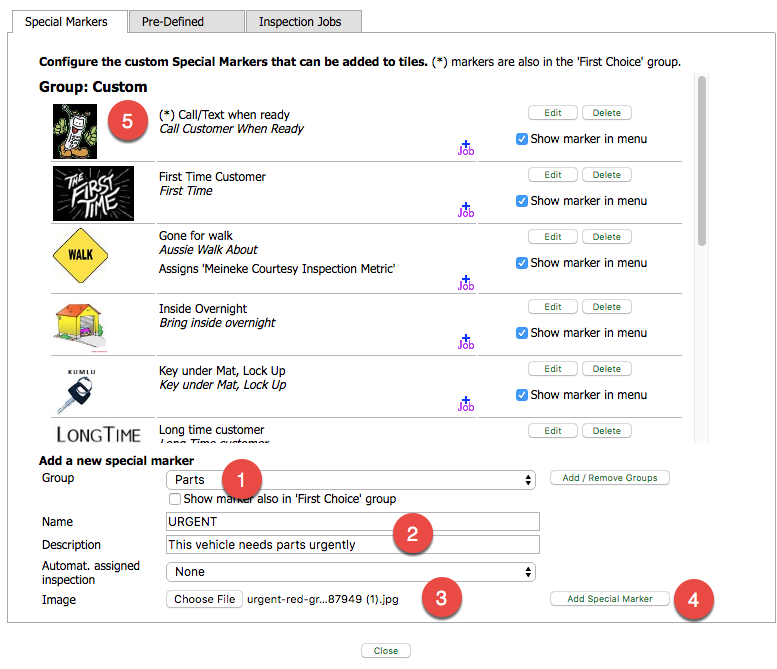
- Select the group the new marker should be in
- add a name and description (appears on hover over on the screen)
- add an image
- press ‘Add Special Marker’
- note that existing markers marked with ‘(*)’ are added to the ‘First Choice” group
- Select the marker from the group they belong to
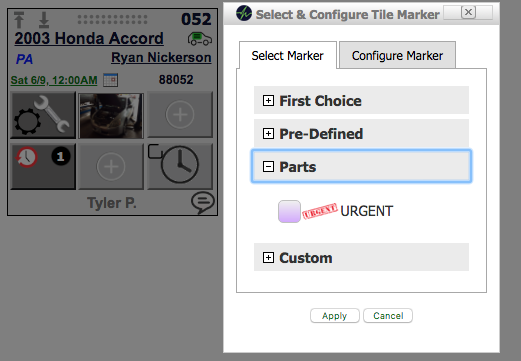
or add it to the First Choice group
Make Markers Hierarchical
Hundreds of Special Markers have been customized by users so that they need to be better organized. All existing markers created by AutoVitals are now in the group “Predefined“, whereas your existing customized markers are all in “Custom“. In addition, the group “First Choice” has been introduced and is always shown first in order to make it easier and faster to select the most often used special markers. The group “First Choice” will always open first and expanded. By adding existing Special Markers to the “First Choice” group, you can customize what special markers, predefined or custom, will be offered as the first choice.
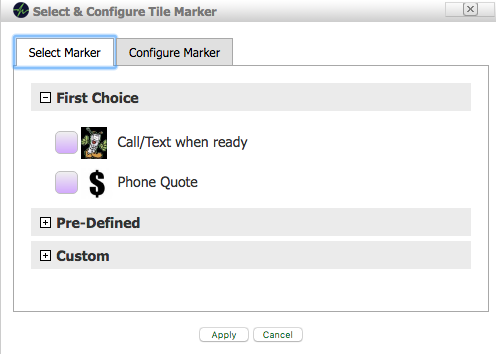
Any existing or newly defined Special Marker can have the attribute “First Choice”. It doesn’t remove them from their host group, it just makes them visible as part of the “First Choice” group.
This article describes how to link inspection sheets to job lines on the RO.
Often the smart markers lining inspection sheets to job lines are not needed to be displayed on the vehicle tile. Go to the setup of the special markers and simply make them visible or invisible to gain a spot for more important markers.
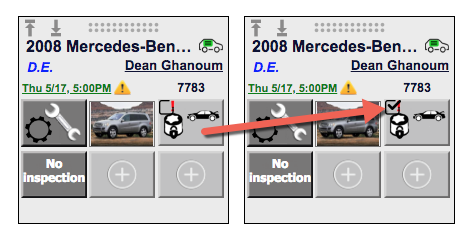
Making Special Markers stay on across visits can be accomplished by simply checking the checkbox in the upper left corner of each tile.
Note that if you try to select more than 3 markers per vehicle or make them permanent, it will not work.
When you create a new marker yourself, you can select between the following types
- Standard (static image)
- Watch (shows a configurable time during the day)
- Count Down (this timer mode counts down the minute starting with a configured value)
- Tech Notes (send a note to the techs tablet as alert, which makes the note flash)
Select any of these types when defining a new marker and take advantage of the countdown timers.
[powr-comments id=e009f6c5_1544647976]
Didn’t Find what you were looking for?
- Release Notes V6.0.52 (TVP.X) and V5.0.58 (TVP Legacy) - October 23, 2020
- Release Notes V6.0.50 (TVP.X) and V5.0.57 (TVP Legacy) - October 11, 2020
- Release Notes V6.0.47 (TVP.X) and V5.0.56 (TVP Legacy) - September 26, 2020