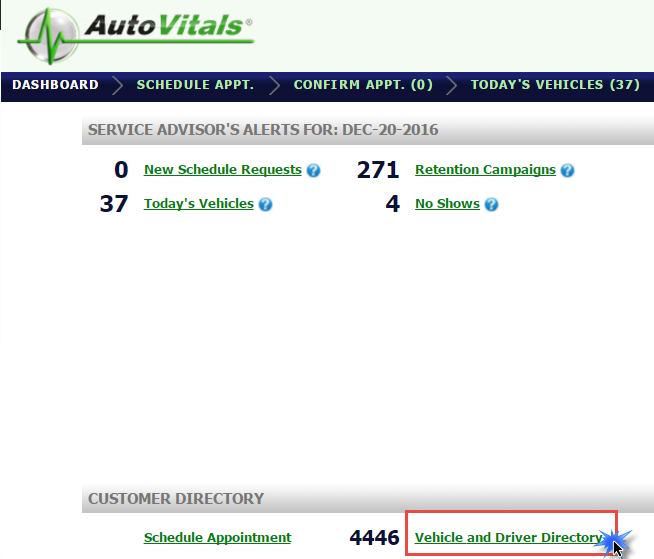
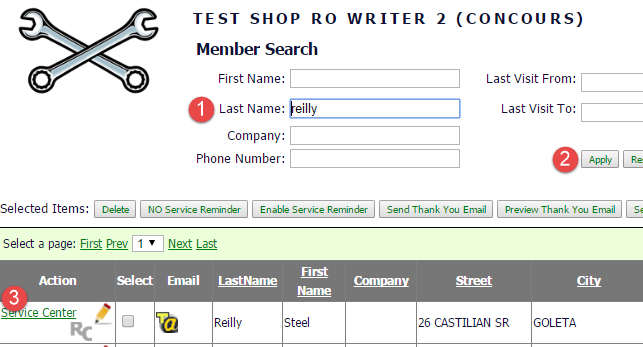
You can access any customer’s service center account from Dashboard > Vehicle and Driver Directory > search customer name > Service Center.
At the end of the visit, your customers will be sent an email invitation explaining the benefits of the Service Center and providing the link for them to sign up. This email is known as the Activation email, because your customers are invited to Activate their accounts. To learn more about how this works and what that email looks like, read this blog post, specifically the tab labeled ‘What does the activation email do?’
Once customers have activated their account, it is recommended that you put a ‘Customer Login’ portal on your website so that your customers can easily remember where to go to log in. For our web presence customers, we will take care of this for you. If you have a third party web presence provider, ask your Product Adviser for the resources to give your provider so they can create the link for you.
Edit or Delete a Vehicle
On the left side of the Service Center, you will find the customer’s vehicles listed. If there are multiple vehicles, just click the drop down menu to view the other vehicles.
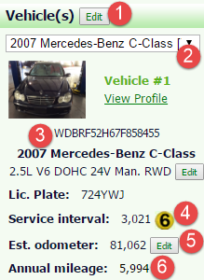
- Edit button – allows you to delete a vehicle, edit VIN, license, odometer, last service date, vehicle driving profile (see more on this below)
- YMM and option to toggle to different vehicles
- Vehicle info (VIN, engine type, license, plate)
- Service Interval and number of months until the next visit is due (this is the number in yellow)
- Estimated odometer (calculated based on the customer’s annual mileage)
- Annual Mileage (calculated based on the odometer of the two most recent visits, or the national average of 13k miles for first time customers)
To delete or edit vehicle info, click the Edit button. Here you will be able to change any information about the vehicle.
If you are getting the ‘Incomplete Vehicle Profile’ message in red, click this Edit button to complete the required info for the vehicle.
To delete a vehicle, click the View my Vehicles button
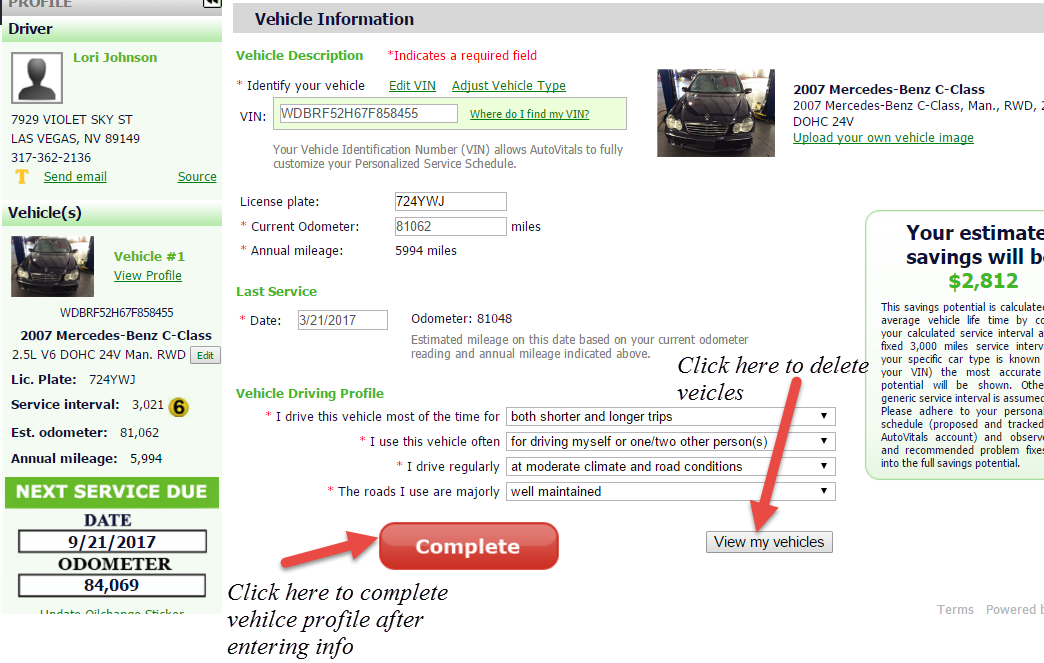
After you hit ‘View my Vehicles’, you will see all vehicles in the account listed. To delete a vehicle, click the trash icon. This will not impact your POS.

Edit Driver Information
To edit driver information (i.e., name, address, phone, email) click ‘Edit’ on the upper left hand side of the Service Center.

Edit Email Subscriptions for Service Reminders
Here you can also check and edit the motorist’s subscriptions to receive email service reminders. By clicking the center tab called Email Subscriptions, you will find a list of all vehicles in the customer’s account.
This customer is set to receive service reminders for both vehicles in her account. You can change this by selecting ‘No Service Reminders’.

Edit Service Interval or Due Date
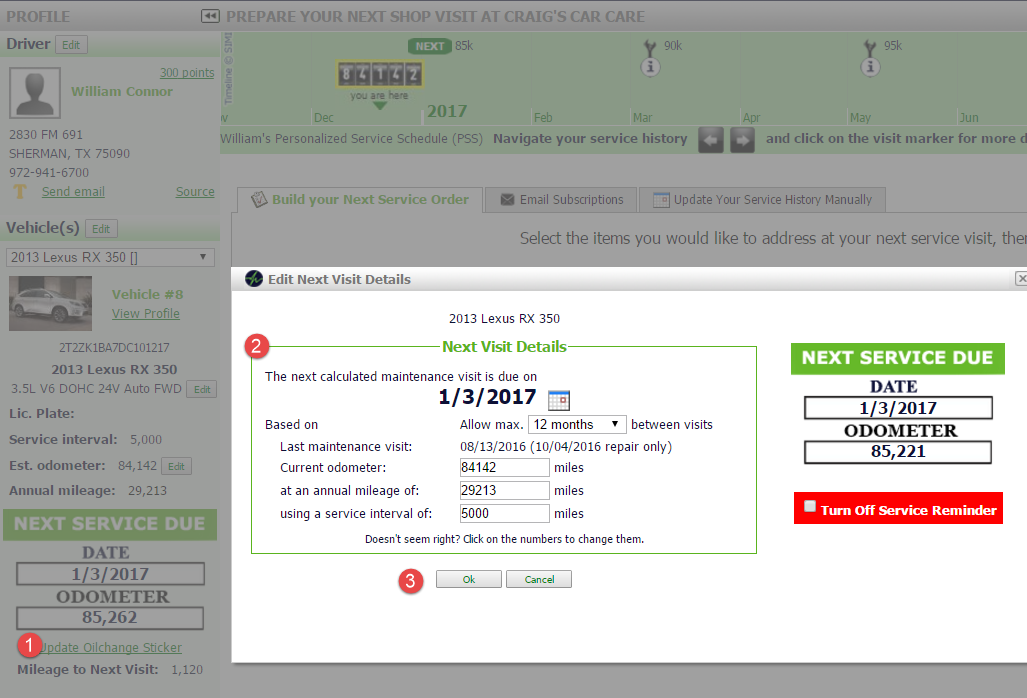
Click on ‘Update Oil Change Sticker’ on the bottom left of the Service Center. This will open a pop up where you can edit the following:
- Due date of next recommended visit (calculated based on their service interval and annual mileage)
- Current odometer (this is the estimated odometer that AutoVitals calculates the motorist is currently at, based on their annual mileage)
- Annual Mileage. For all new customers, this is by default the national average of 13,000 miles. At each next visit, the Annual Mileage is recalculated based on the odometer at their last visit and the odometer at the most recent visit.
- Service Interval. This determines when the vehicle comes due for Regular Maintenance (i.e., oil changes) and subsequently when they will be sent service reminder emails and postcards (if applicable).
Loyalty Points from the Service Center
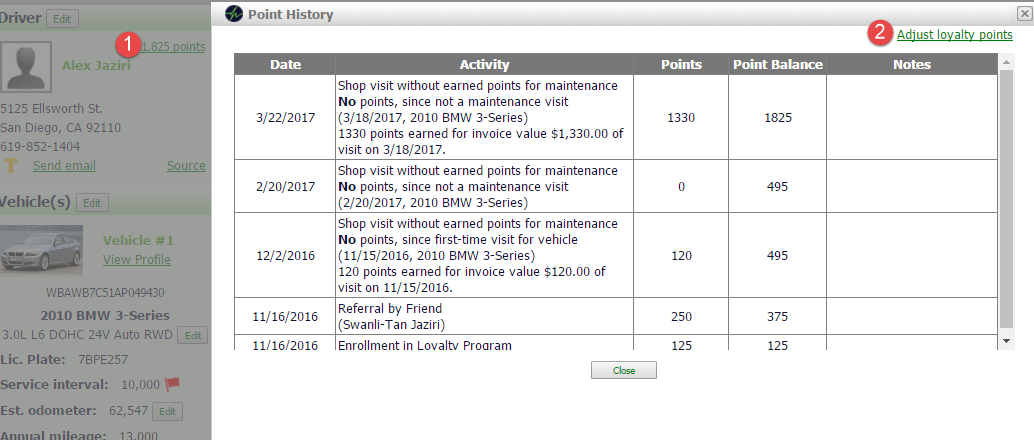
If your shop uses the Loyalty Points program, you will see the number of points the customer has earned. By clicking on the number of points, you will see a history of how all points were earned.
To adjust loyalty points balance, click ‘Adjust loyalty points’ in the pop up.
Service History
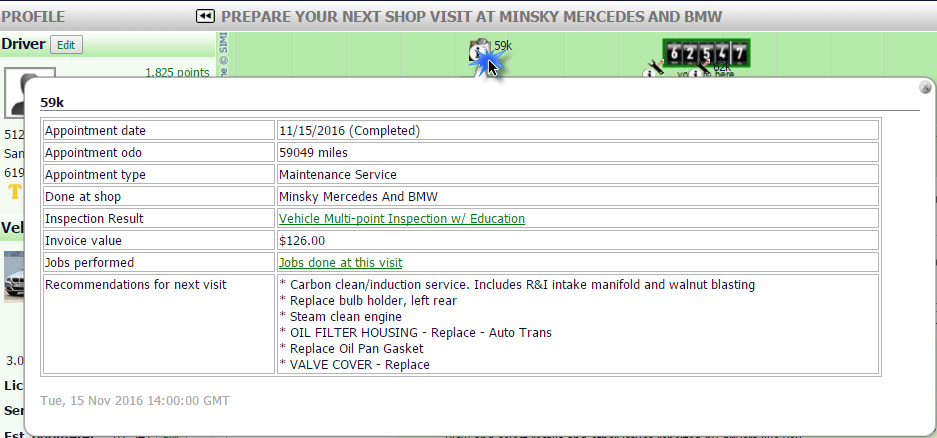
All service history for the vehicle will be shown in the Service Center, even before your shop started with AutoVitals CRM. Toggle the calendar arrows to navigate back in time to see history for old visits. Each small white “i” icon represents a previous visit.
Navigating forward on the calendar will show you the recommended future visits, based on the vehicle service center and annual mileage.

When the “i” icons are clicked, you will see the appointment date, appointment ODO, appointment type, shop name, inspection result, invoice value, jobs performed, recommendations for next visit.
Recommended Work, Recalls, TSB’s
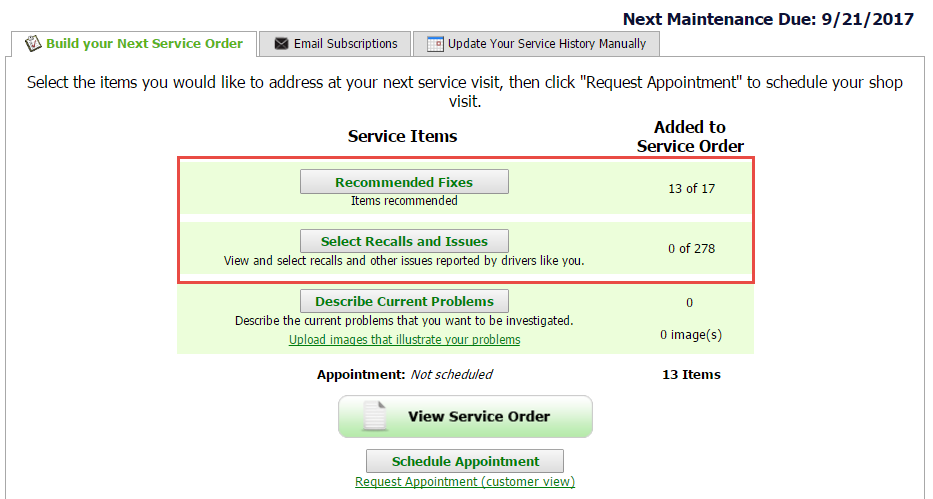
Under the ‘Build your Next Service Order’ Tab, you will see the ‘Recommended Fixes’ and ‘Select Recalls and Issues’ buttons.
Recommended Fixes pulls the recommended work and/or declined jobs from your POS left at the end of the last visit (based on your settings, check with your Product Adviser for your shop’s settings). You can learn more about how this works and how to make sure the correct jobs show up for your customers, including POS specific instructions, by reading this blog post.
Please note that we will only show recommendations from your POS that are due within 4 weeks of the next visit due date. If the next visit due date is November 1, and you made a recommendations in your POS for a brake and rotor jobs due on Nov 15, it would show. If the due date was Dec 17, it would not show since Dec 17 is more than 4 weeks ahead of November 1.
Recalls/Issues displays the recalls, TSBs, and issues experienced by other drivers of this YMM. The motorist can check a box next to any one of these issues, so that when they request their appointment, your shop will be notified that they would like this issue addressed.
Requesting Appointments
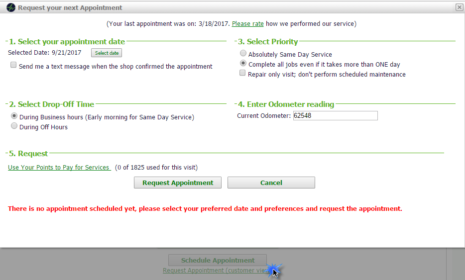
Once the customer has selected the recommendations, recalls, and/or TSBs they will click Schedule Appointment. Once completed, this will send an email notification of the request to the Primary Service Adviser, as well as send a notification to your AutoVitals dashboard. In this appointment request form, the customer will also be able to request to redeem their loyalty points, if they are eligible to do so.
![]()


