
Turn your Phone to Landscape
![]()
V4.5: How to Access the Inspection Sheet
The new worksheet allows for three new methods for accessing the inspection sheets.
*Navigate accordion tabs for more information*
Special Markers (Best Practice)
Special markers for inspections are now a best practice for assigning inspections to the technicians. When configured, this method automatically displays a new inspection button on the technician’s work order. Special Markers are assigned an inspection sheet from your shop’s library and are trigged by the designated canned jobs within your PoS (point of sale). This allows multiple inspection sheets to automatically be assigned to a vehicle.
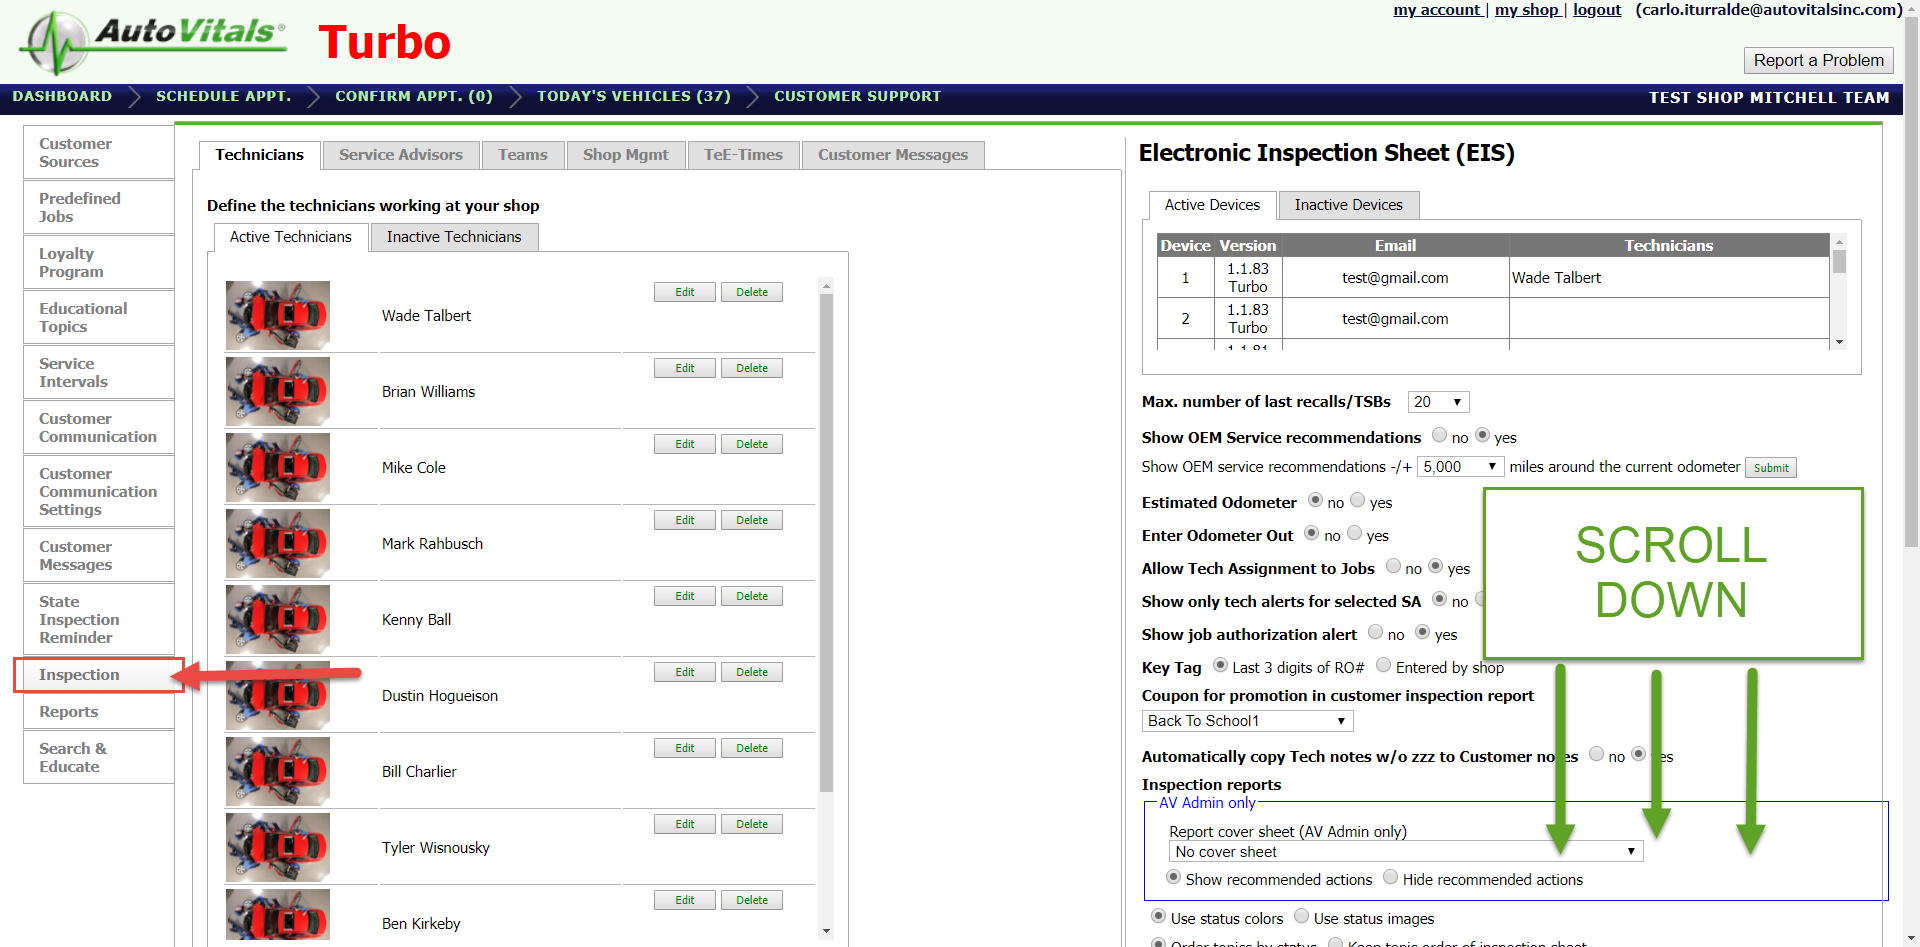
First, you will need to configure the special markers on using your TVP inspection settings.

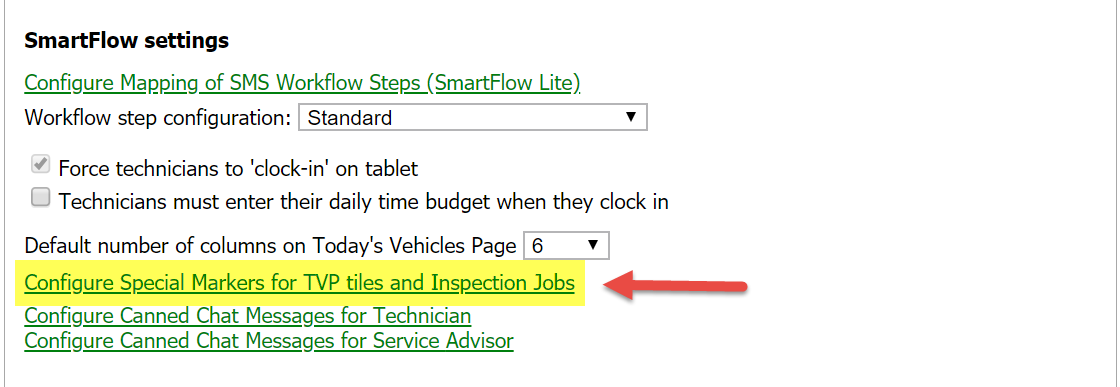
Go to the inspection settings and navigate to the shop management tab. Then, go to “Configure Special Markers for TVP”
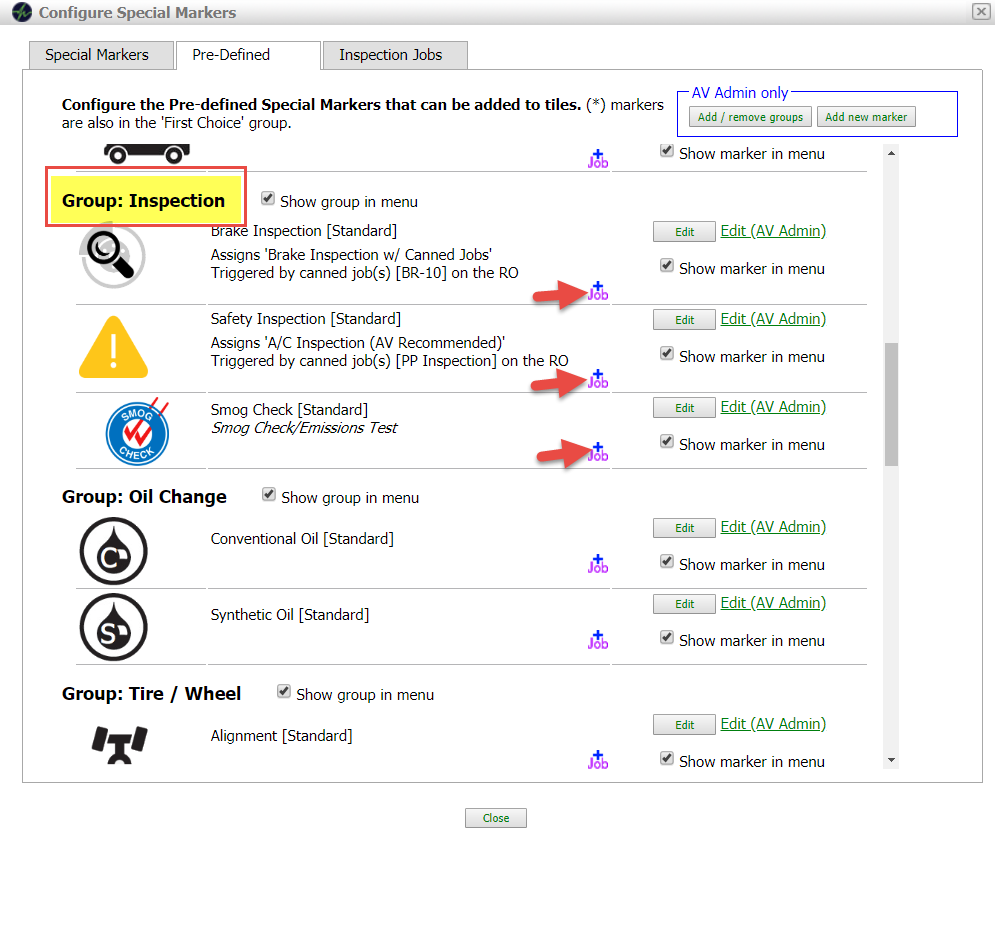
Navigate to the “Pre-Defined” tab and scroll down to the “Inspection” group and click on the “+ Job” button
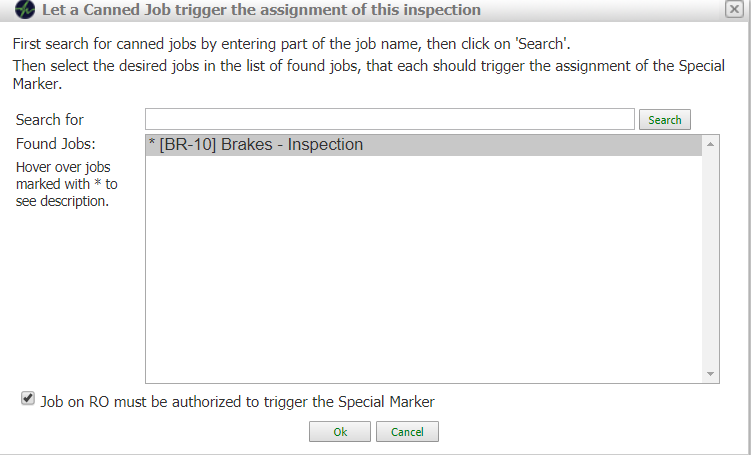
Search for the canned job that you want to attach to this special marker
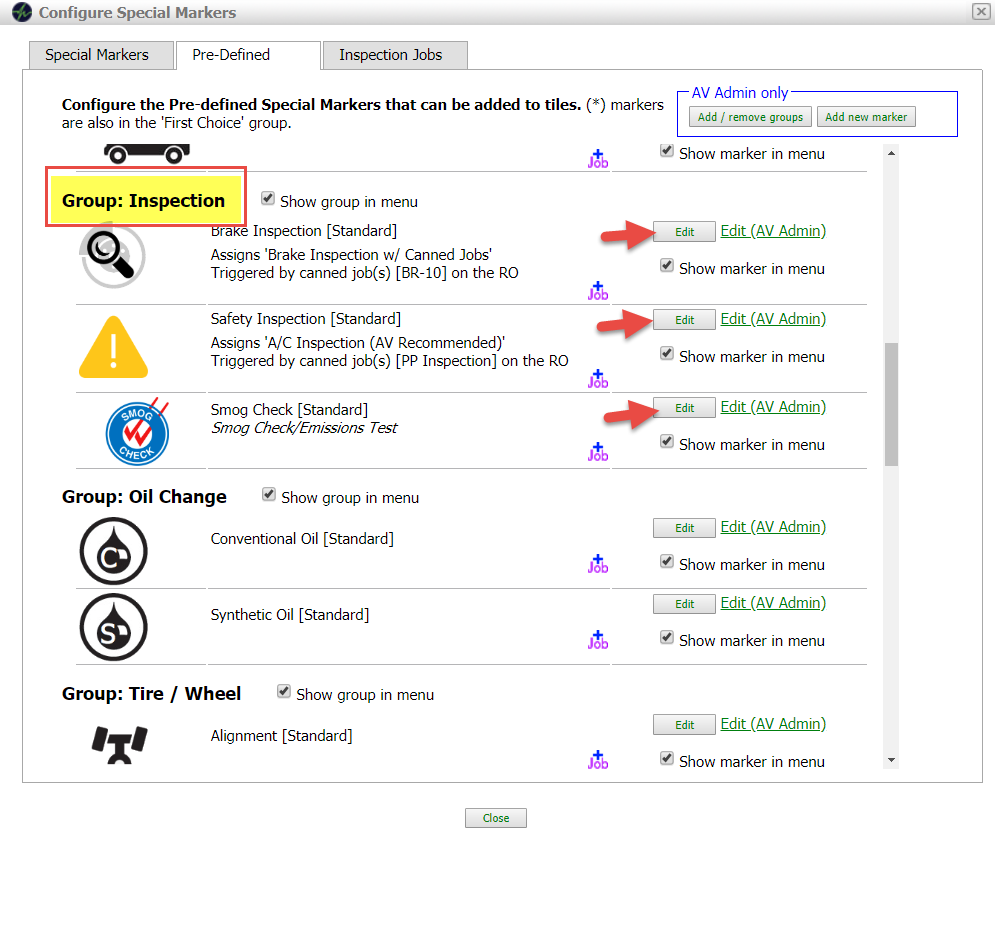
Notice that the canned job is now attached to the special marker you selected. Next, select the “Edit” button to link the inspection sheet of your choice.
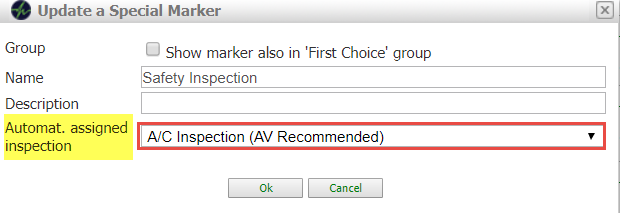
Utilize the drop-down to select the inspection sheet you want linked to the canned job you just selected earlier.
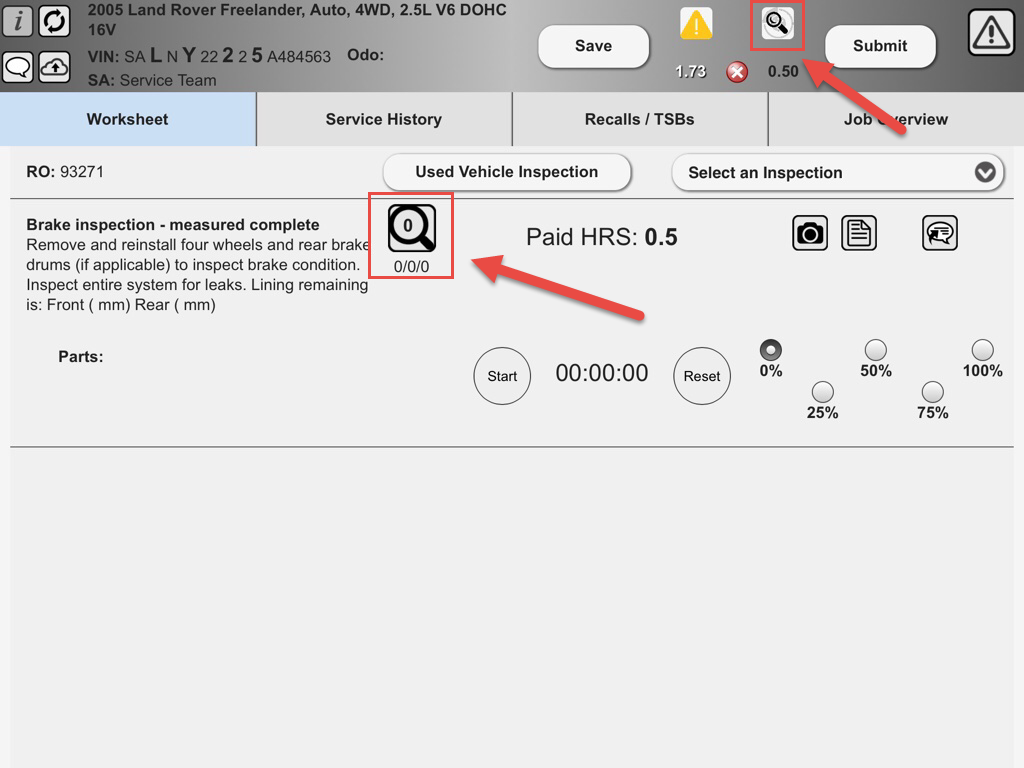
If the job is approved, then the assigned technician will see this on the Worksheet. The magnifying glass itself is a button linked to the inspection sheet. The numbers below show a summary of the sheet’s progress in the format (# of topics/#conditions/# of actions)
For more information on Special Markers, please visit:
Permanent Markers
Smart Markers
Default Inspection Button
The most simplistic method for accessing the inspection sheet on the tablet is to simply press the default inspection button. This helps increase efficiency, by minimizing the techs effort to begin inspection to just one tap.
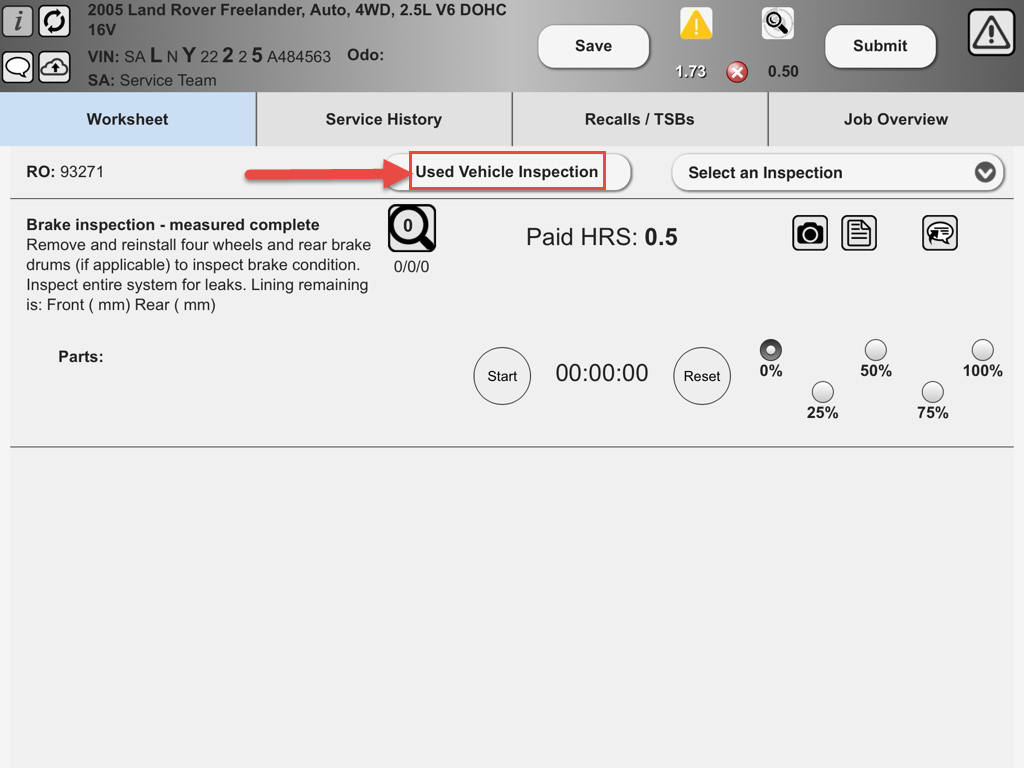
This button is linked directly to the inspection sheet that your shop marks as “default”
To assign an inspection sheet as default ….
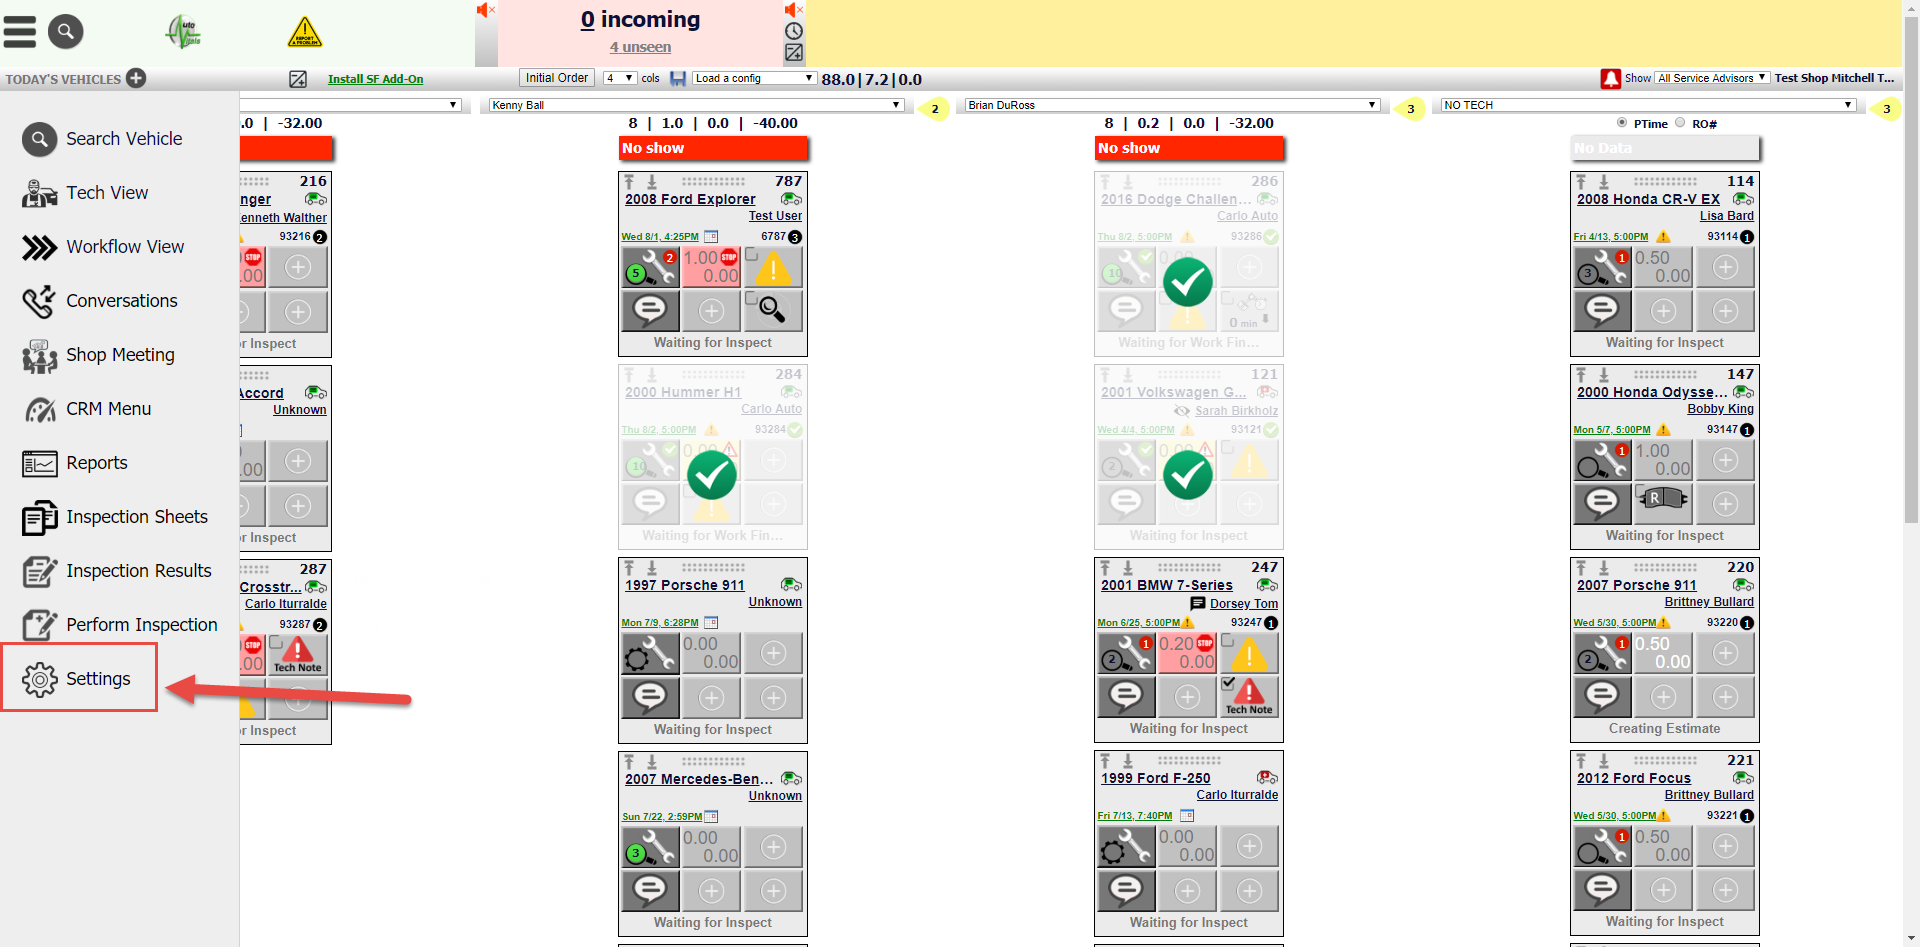
From the TVP menu, select the settings

To refresh your memory on default inspection sheets, please go to the inspection settings by pressing the big red button.
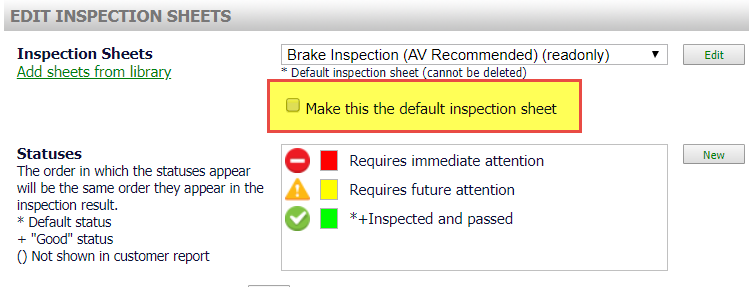
Finally, select the inspection sheet from the drop down and make sure that the “default” check box is selected to make this the default sheet.
Drop-Down Menu
We’ve implemented a drop-down menu to access your shop’s whole inspection sheet library. This feature gives technicians more freedom in selecting the correct inspection for each vehicle. More importantly, this eliminates the need for multiple vehicle tiles for multiple inspections on the technician’s tablet.
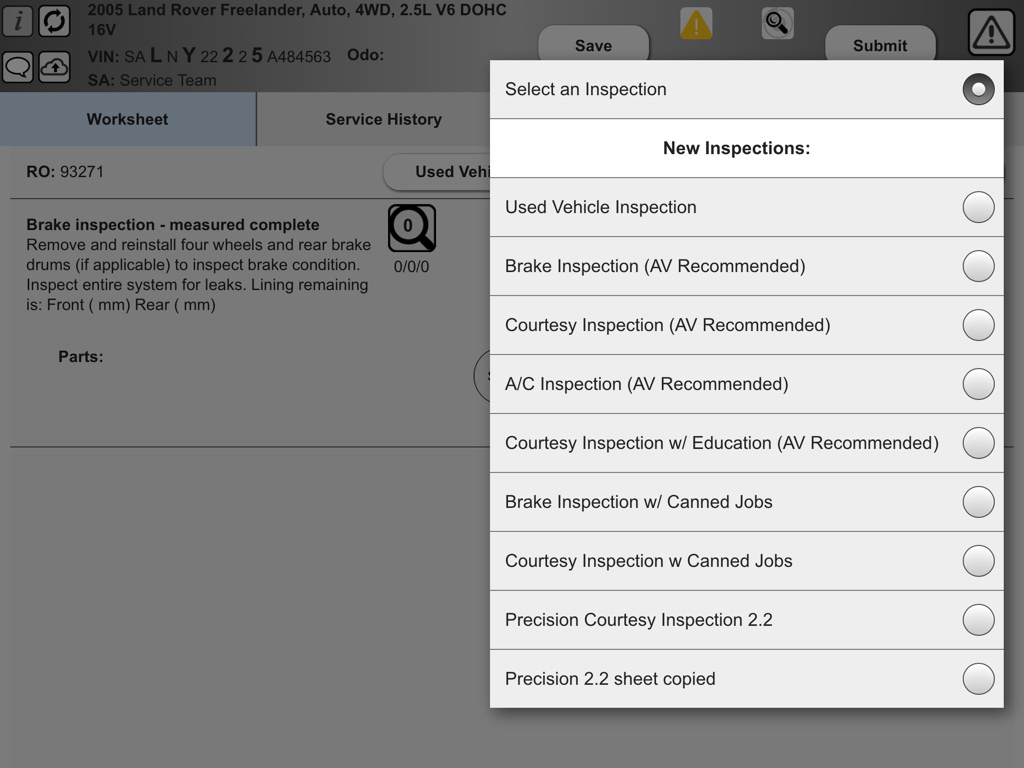
Here, you can see and access all of the inspection sheets in your shop’s library.
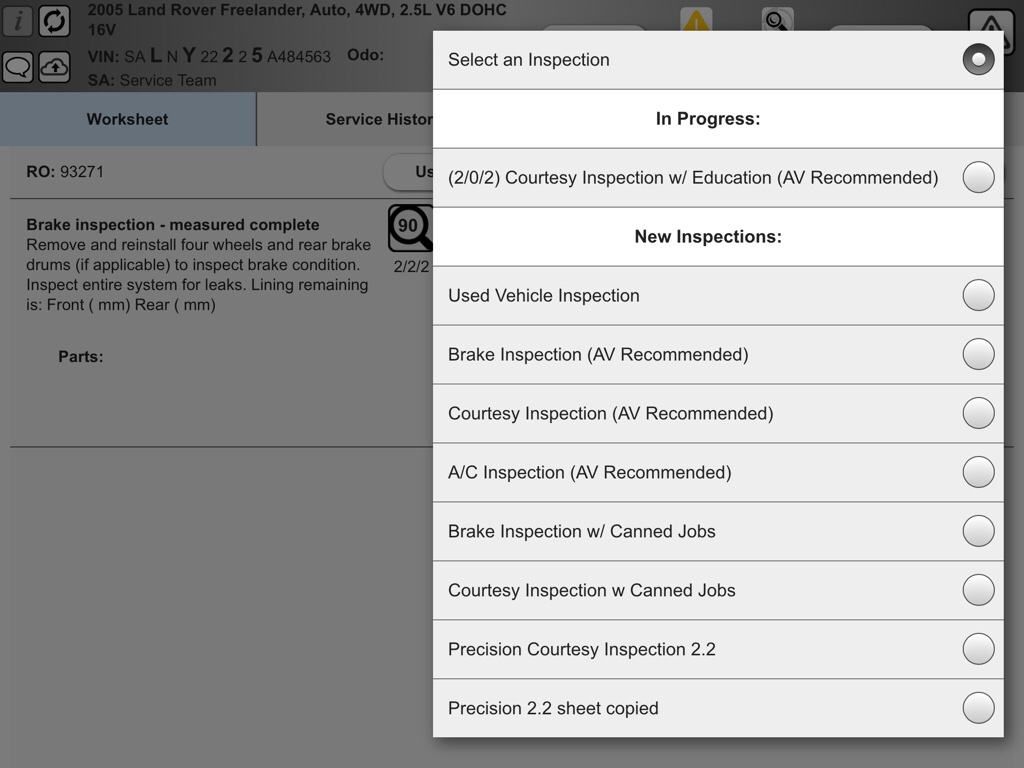
Once you make and save progress on an inspection sheet, the “In Progress” section appears within the drop-down with the inspection sheet you began. Also, we have included a progress summary directly to the left of the inspection sheet name. The format of the progress follows: (# of topics/ # of conditions/ # of topics)
Didn’t Find what you were looking for?
Latest posts by carlo (see all)
- Alerts for Coaches in BCP - April 19, 2021
- Release 3/27/21 - April 1, 2021
- Release Notes V6.0.96 (AutoVitals.X) - December 5, 2020